Finding the right power supply for your computer can be confusing. With so many options and technical specifications, it’s hard to know where to start. If you opt for a pre-built PC, you might be good to go. However, if you’rebuilding a PC from scratch,consider several factors to ensure the PSU’s compatibility.
Choosing the wrong PSU might result in yourPC not booting, becoming unstable, or even damaging the hardware components.
Once, I overlooked my system’s power requirement and purchased a PSU that lacked sufficient headroom for my GPU. Consequently, I had to return it and get a higher wattage one.

To ensure PSU compatibility, start by checking the pin configuration and number of cable connectors you require. Then, calculate the power requirement of your system and get the right wattage PSU.
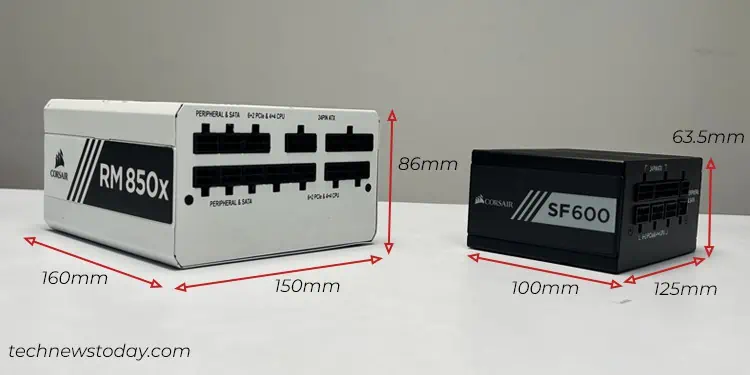
Next, select a PSU that fits snugly into your PC case’s PSU compartment. Also, consider the modularity suitable for your build.
Almost all the power supply units these days follow theATX standard. So when it comes to connector compatibility, you should not have problems using any PSU with your setup.
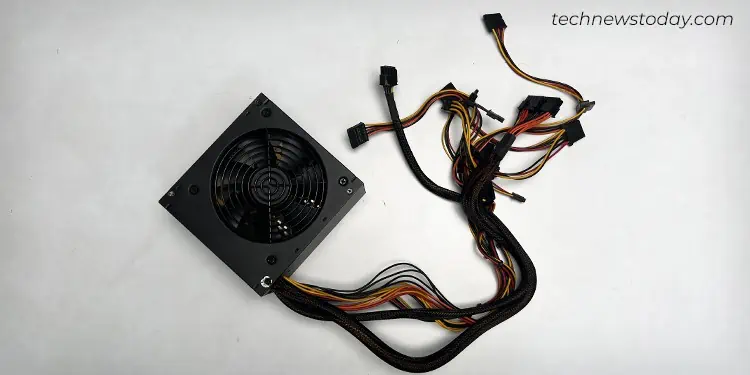
You will be getting a 20 or 24-pin ATX power connector for connecting the motherboard to your PSU, 4 or 8-pin connectors for powering the CPU, and a 6, 8, 12, or 16-pin connector for your GPU, including a few connectors forpowering the SATAand Molex devices too.
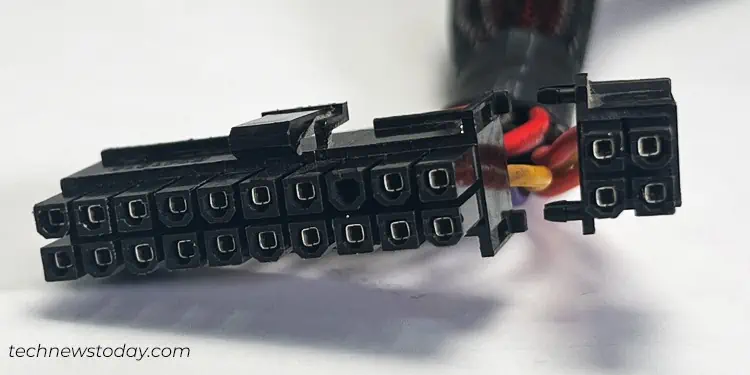
Coming to the ATX power connector, the 24-pin ones are primarily designed for motherboards with a 24-pin ATX header. But they are also backward compatible with the older motherboards that only have a 20-pin ATX header. The only thing is the connector should have detachable blocks—the 20-pin block and 4-pin block.
On the flip side, 20-pin power supply connectors are generally used only for motherboards having a 20-pin ATX header.
You may get any one of them depending on your requirement. The best bet would be to get a 20-pin connector for a 20-pin motherboard and 24 pin connector for the boards with 24 pin ATX header. You may also opt for a (20+4) pin connector if you want increased flexibility.
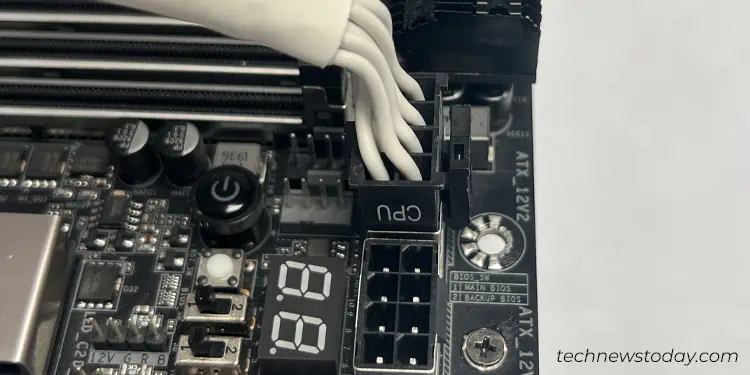
Similarly, check the pin configuration of the CPU connector and get the compatible one. Below are the ATX_12V1 and ATX_12V2 headers for plugging the CPU power connector in my GIGABYTE TRX40 AORUS MASTER. I have plugged in the single 8-pin connector for powering it.
Now coming to theGPU connectors, ensure what pin configuration it requires. Most of the GPUs out there use a standard 6 or 8-pin configuration, but it may vary depending on your model.
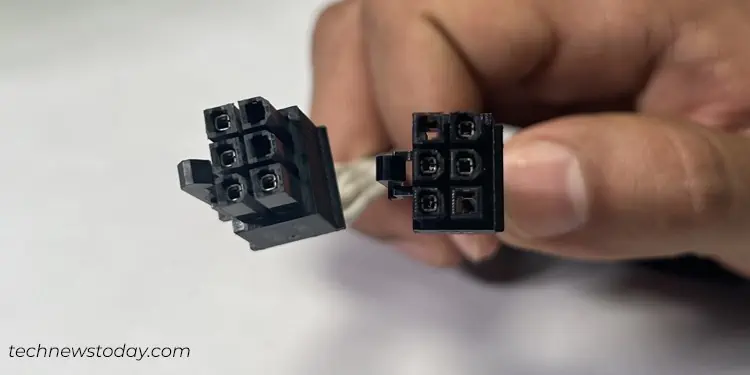
For instance, the latest Nvidia’s GeForce RTX 40 series utilize a 16-pin12VHPWRconnector. As such, you may have to choose a PCIe 5.0 compatible PSU.
To sum up, it is not that difficult tofigure out the connectorsrequired for your setup. But hold on! There’s still one more thing. You should also check the number of each cable connector the PSU comes bundled with.
Your PC can basically get up and start working with one of each type of connector, but that might not be the case if you have multiple numbers of the same component or are into overclocking.