Like a lot of other manufacturers, HP installs bloatware (preloaded software) on their devices. HP Audio Switch is one of these, and there’s a common issue where thebox will pop up on your screen and won’t go away.
The reason why this happens isn’t exactly clear, but it may be because of corrupted files. There are a few things you may try, to remove the box and, hopefully, keep the problem from popping up again.
These steps mostly work the same regardless of which version of Windows you have, but they are geared towards Windows 10.
Disable Audio Switch at Startup
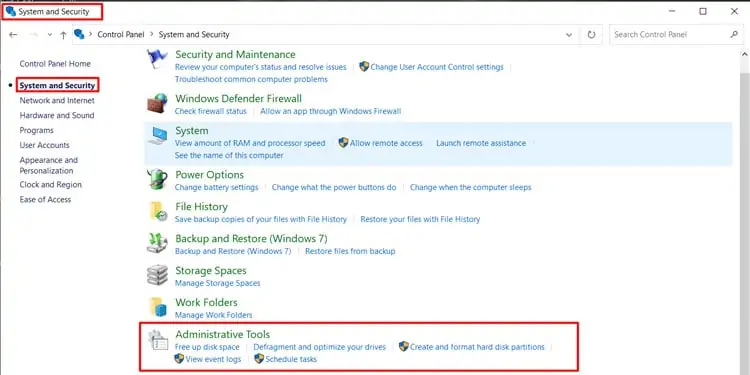
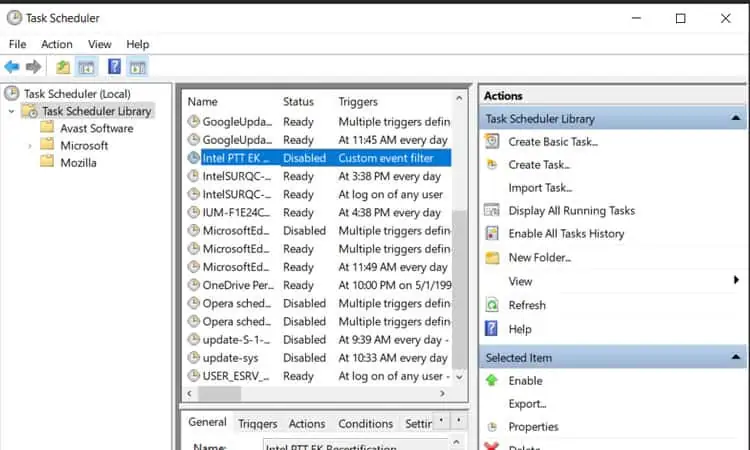
Normally you may disable startup tasks in the Task Manager, but HP created a scheduled task in the system settings for HP Audio Switch. That meansyou’ll have to use Task Scheduler. To find it, open yourcontrol paneland click onSystem and Security. Scroll to the bottom and click onAdministrative Tools. A new window will open up.
Look through the list and findTask Schedulerthen double-click to open it. Another new window divided into three sections will open up now. In the right-hand menu, click onTask Scheduler Library. A list of the currently scheduled tasks on your computer will show up in the middle. FindHP Audio Switchin the list and select it.
Finally, look at the bottom part of the left-hand section under Selected Item. There you’ll see aDisable option. select it and restart your PC for it to take effect. If you ever want to re-enable HP Audio Switch again, you may just follow these steps andclick on Enable instead. You can also click on Delete but that won’t give you the option to re-enable the setting at a later time.
Update Your Audio Drivers
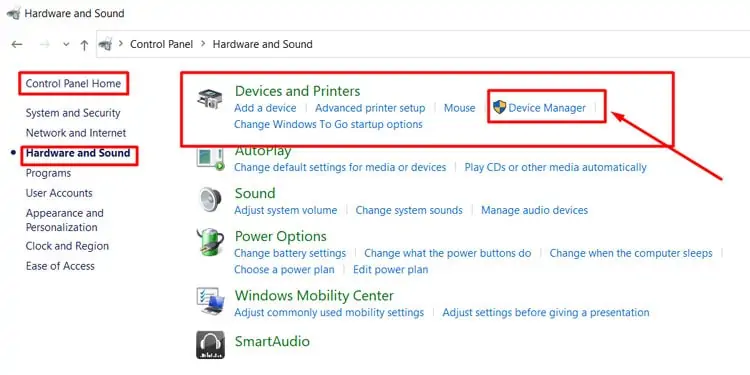
It’s possible that fixing your audio drivers will overwrite any corrupted files and make the box disappear. To do that, open up theWindows Control Paneland selectHardware and Sound. In the new menu, selectDevice Managerin the list underDevices and Printers.
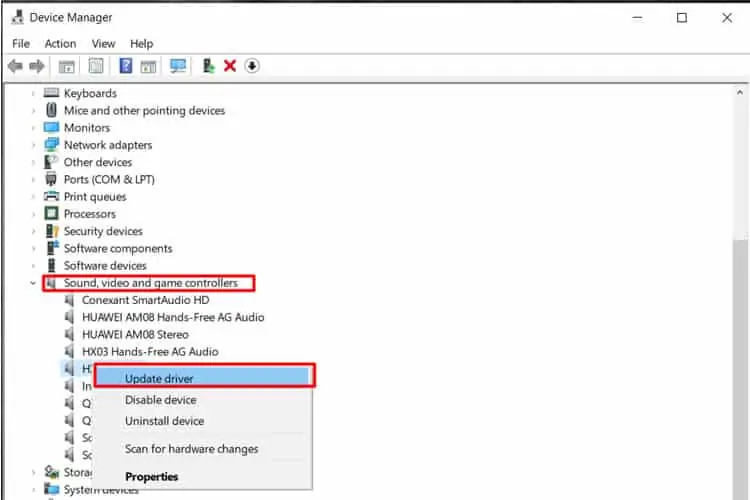
Look for “Sound, video and game controllers” in the list and find theHP Audio driveror selectyour computer’s main audio speaker/device. Right-select it and select “Update driver”.
In the new window, select “Browse my computer for drivers” and then on “Let me pick from a list of available drivers on my computer”. Select the HP Audio drivers.you may alsochoose to uninstall the drivers, but then you’ll have to reinstall them again or your sound won’t work at all. Find thecorrect drivers for your computeron HP’s website.
Repair Corrupted Files With Windows System File Checker
If updating your audio drivers doesn’t repair the files, you may repair them manually. There are technically two ways to run System File Checker in Windows 10. I’m going to describe the easier method here as the other requires that youenter the BIOS settings. This does require typing some commands into the command prompt, but if you follow the instructions carefully it will work.
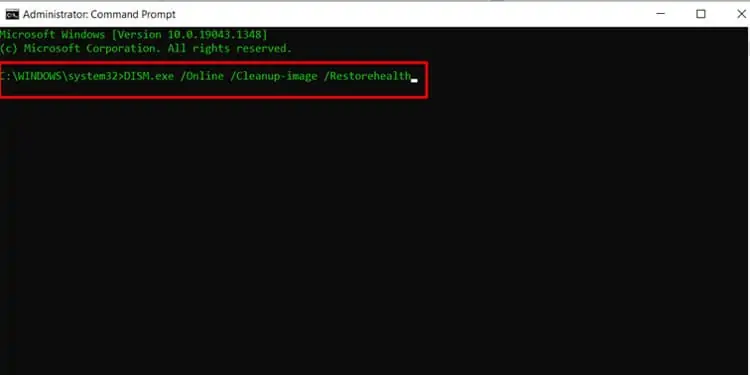
First, openCommand Promptby typing cmd into the search bar on your Windows taskbar. ensure to right-select the app and select “Run as administrator” then click on “Yes”. After it opens up, type “DISM.exe /Online /Cleanup-image /Restorehealth” (without quotation marks) then press enter. You need to include the spaces before each / for it to work.
That first step may take as long as 30 minutes. After it’s done, you’ll see a notification on Command Prompt that the operation was completed successfully. Now, type “sfc /scannow” (without quotation marks) into the command prompt and press enter again. Note the space before the / here as well.