SSD, or Solid State Drive, uses flash memory to store data that you may access digitally. This results in the SSD to have faster read, write and access time, making it much more efficientcompared to its counterpart, theHard Disk Drive(HDD).
As access time on an SSD is low, any applications installed inside the SSD will load much faster than the application installed in a slower storage device. This is why most users install their Operating System in SSD. Doing this allows to load the OS into the RAM much more quickly, decreasing the boot time.
This article explains a step-by-step guide for users who want to use SSD as boot drive.

Advantage of Using SSD as Boot Drive
Before we jump into the how-to of the topic, let’s see why using an SSD as a boot drive is good for the PC. As data inside the SSD are accessed and written digitally without requiring any physical moving components, the PC can load the OS data faster due to low latency.
Due to these particular reasons, PC builders always use an SSD as a boot drive. Therefore, if you want to upgrade your PC, installing the OS in SSD is the cheapest and easiest upgrade.
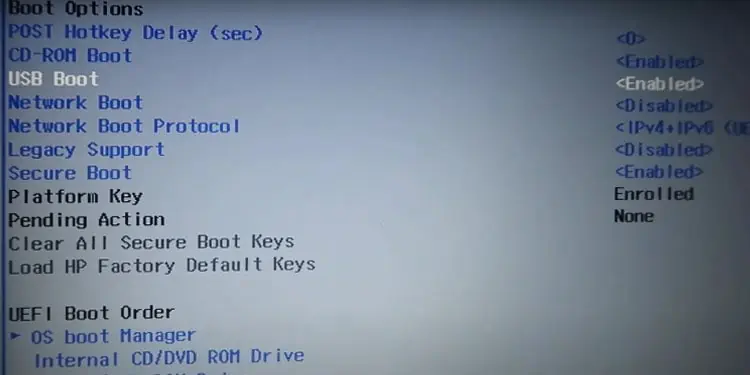
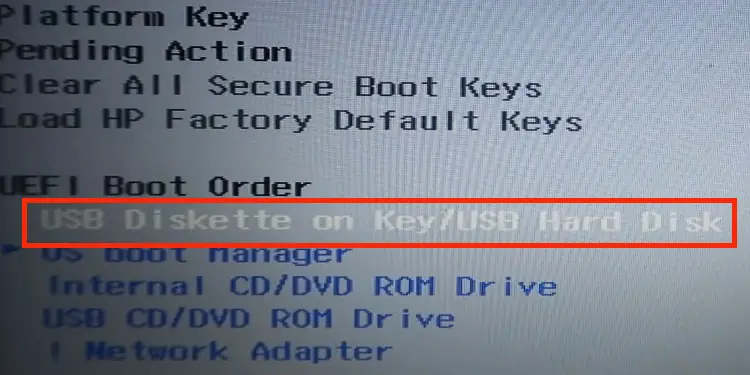
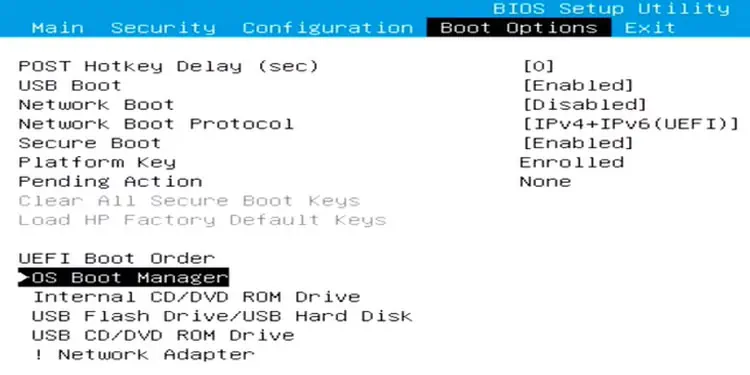
How to Use SSD as Boot Drive?
Now that you know why most users install the OS in the SSD let us see how to boot from an SSD. You need to perform three steps before booting your PC with the SSD.

Firstly you need toconnect the SSD to the motherboard.Secondly, you need to clone an existing OS or install a new one into the SSD. And finally, you need to set the boot priority to SSD.
Below, we have explained each step in detail.
Insert the SSD Into the Motherboard
For the PC to detect the SSD, you first need to connect it to the motherboard. To do this, you need to open up your PC.
The installation process may vary depending on the type of SSD you use. If you are using a 2.5-inch SSD, you will require a SATA data cable and a SATA power cable. If you are using an M.2 SSD, a screwdriver will be enough.
If you are using an External SSD, you may simply connect the SSD to a USB drive.
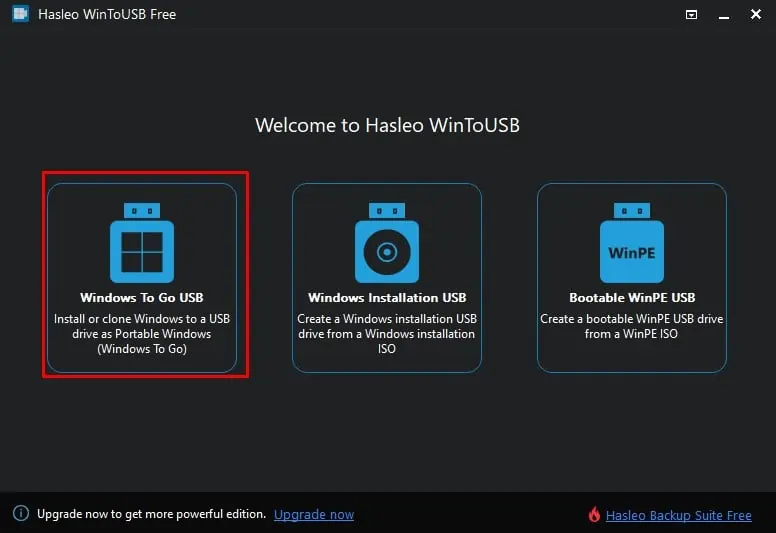
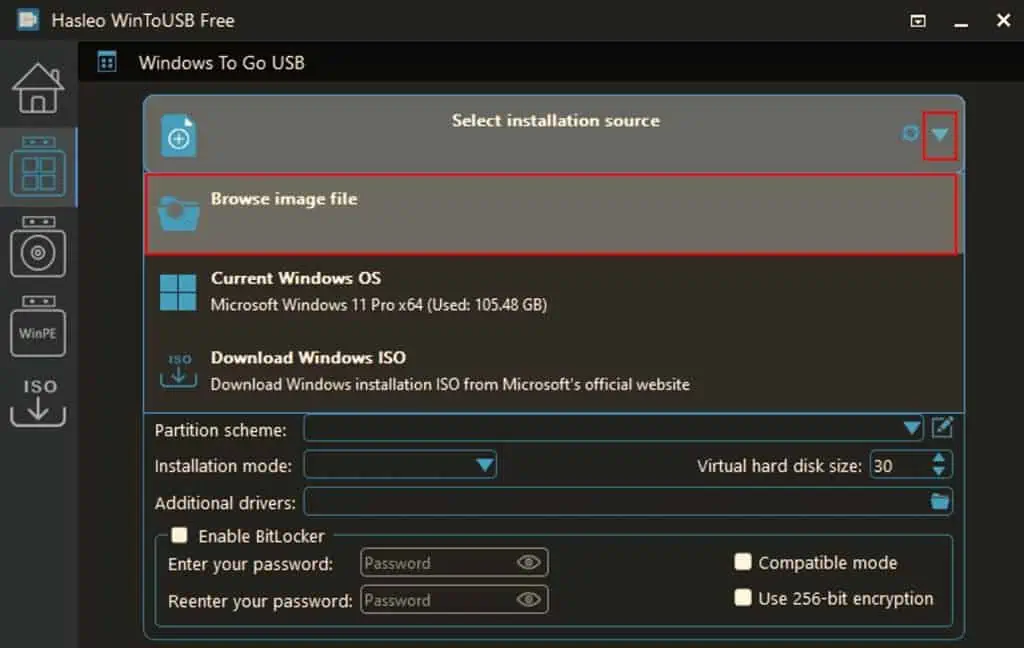
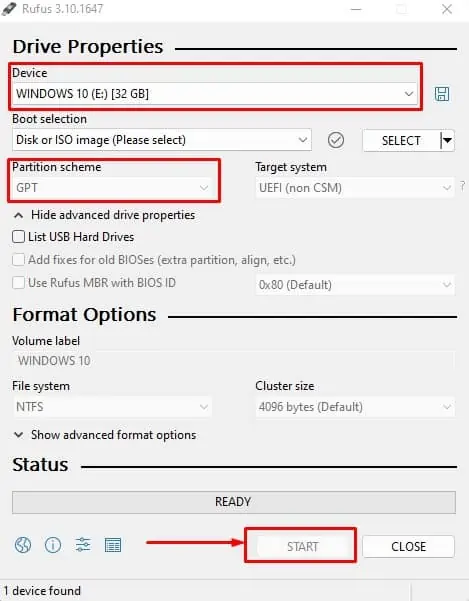
Install OS in the SSD