Remote Desktop Connection is the default feature on Windows devices that allows you to remotely control it using another device. During a remote session, the computer gets logged out, and all control is given to the client device.
It is useful if you want to access or control your remote computer while doing any other tasks at your home or office.
Below, I have provided all the steps you need to initiate and use Remote Desktop Connection for LAN and WAN access.
Please note thatonly Steps 1, 4, and 5 are necessary if you wish to access the computers on the same LAN.
Step 1: Enable Remote Desktop Connection
The first thing you need to do is enable Remote Desktop Connection (RDC) on the computer which you wish to access remotely.
you may enable RDC throughWindows Settings, the System Properties dialog box, or directly by changing the relevant registry entry.
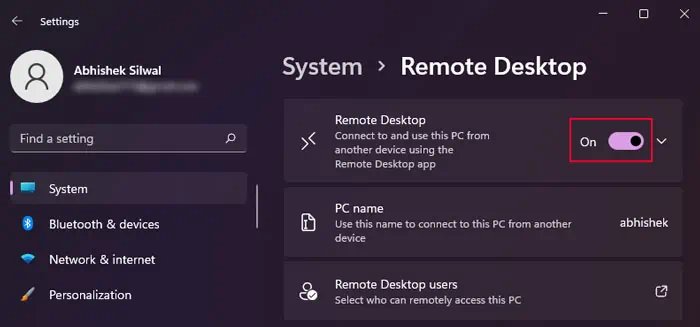
Through Windows Settings
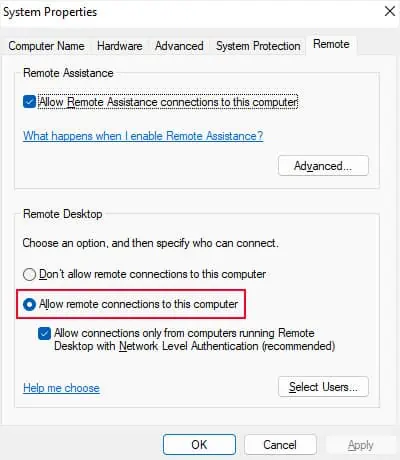
From System Properties
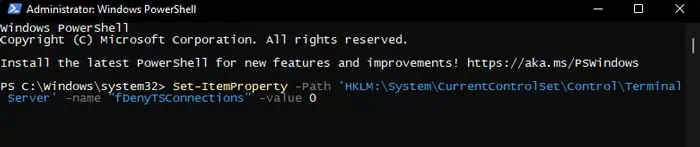
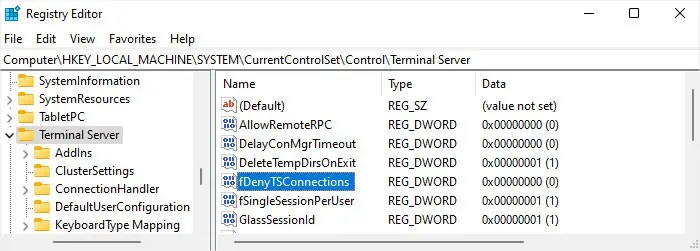
Using Registry Editor
you may also utilize the following commands on the respective command-line tools with admin privileges to make same registry changes.
Step 2: Enable Port Forwarding for Remote Desktop on Router
Your router will restrict any direct access to your device from an external network. So, you won’t be able to initiate a remote connection from another network by default. To facilitate this process, you must enable such access throughport forwarding.
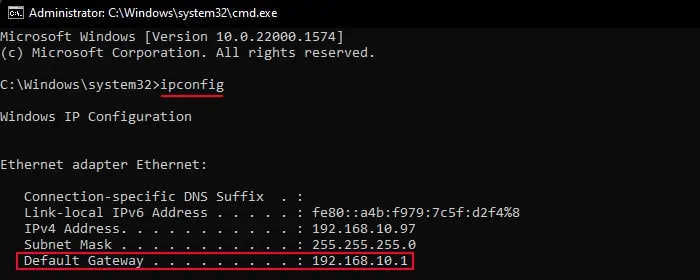
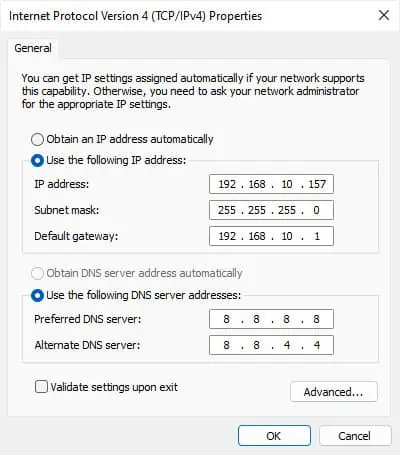
Also, you will need to specify theIP addressfor port forwarding access. However, your network’s DHCP can assign a new IP to you at any time.
There are many things you may do in this case, but the easiest is to set up a static IP on the computer. After that, you can begin setting up port forwarding.