Having an up-to-date DirectX is vital in running any multimedia, especially for gaming on Microsoft operating systems.
This guide will show you how to check the current DirectX version on your PC and give you easy-to-follow steps o update your DirectX. It’s a relatively easy fix, so fasten your SATA connector cables and let us dive right in.
How to Check Your Current DirectX Version
Before you update your DirectX, ensure which version is currently installed. Some PCs that use older GPUs will not support DirectX 12, so it is essential to know which generation of Dx12 to download beforehand.
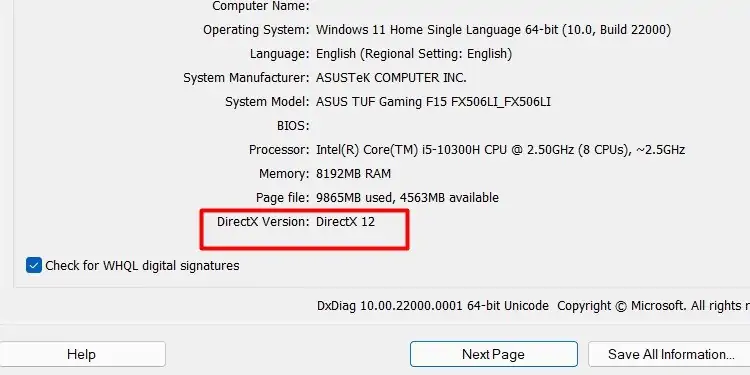
The steps to see your current version are:
you may see the generation of DirectX above as DirectX 12 and the exact version listed below it. The same steps to check your version of DirectX apply for Windows 8 or Windows 7.
BY DEFAULT, DirectX 11.3 and 12 come pre-installed with Windows 10 Operating Systems.
How to Download and Update DirectX 12
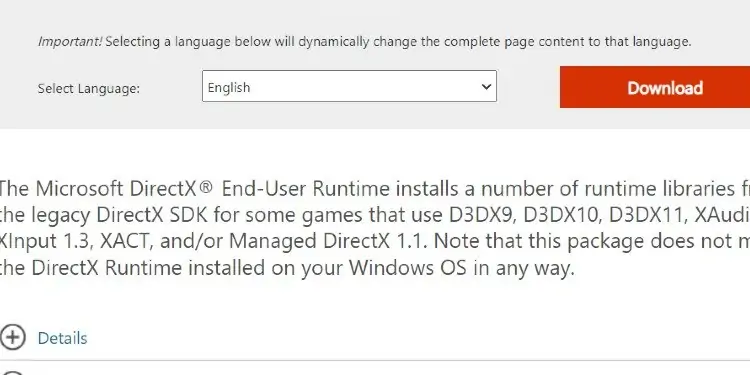
There are two ways to update DirectX 12 on Windows. The first one is to download it manually from the officialMicrosoft software support page.
To install the software after downloading, follow these steps:
The second way of installing DirectX 12 is by forcing windows to update your Operating System.
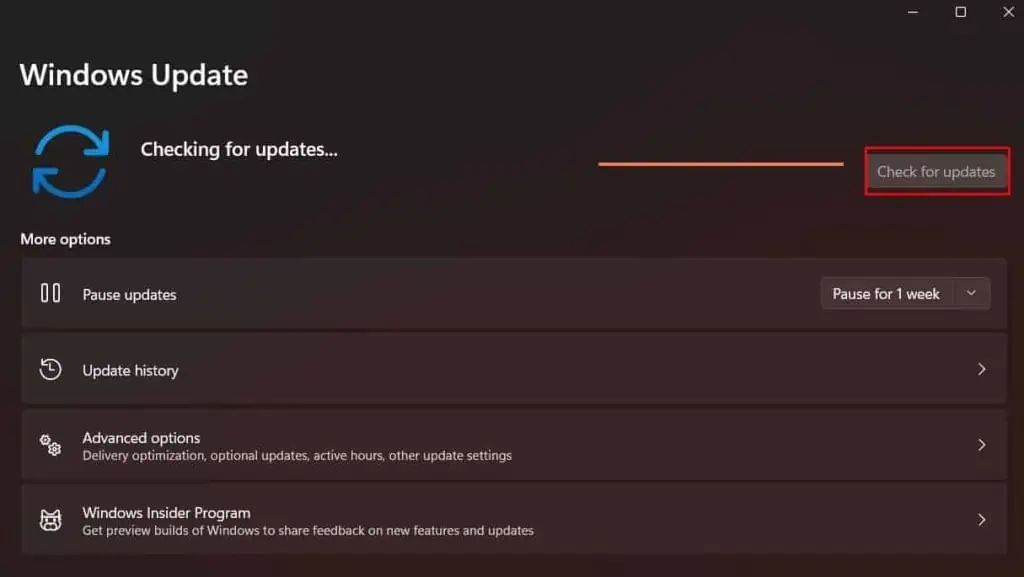
Here is how to ensure that your Windows PC is running the latest available software version.
After the updates are installed, please restart your computer and check the new DirectX version with the steps we showed you earlier to verify that it is updated.
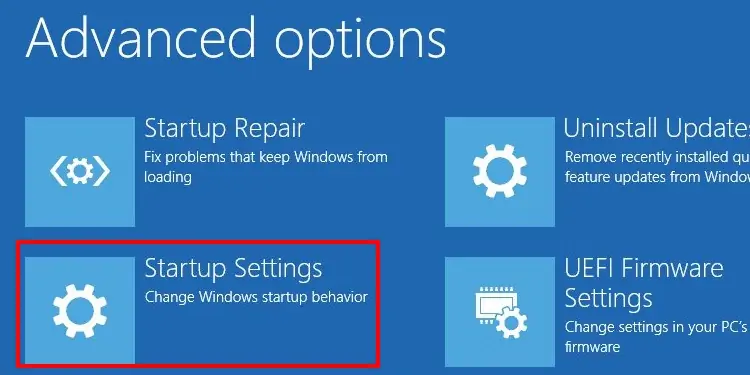
Install DirectX in Safe Mode
To update DirectX indirectly, this is how to force Windows to perform a manual Software Update to the newest Windows Operating System version.