In older Windows versions from MS-DOS 6.2 to Windows 98, the MS-DOS command SCANDISK was used to check for and repair disks. It could check the File Allocation Table (FAT), file system structure and linkage, FAT drive metadata as well as the physical sectors or clusters on the disk.
Since Windows XP, the operating system needed NTFS-formatted disks. So, this older process is already obsolete and Microsoft replaced it with the newer CHKDSK command or program. It can perform the same scan and repair process for all types of disks/drives and more.
you may run this app through the graphical interface or using a command-line interface like Command Prompt.
Using the Graphical User Interface
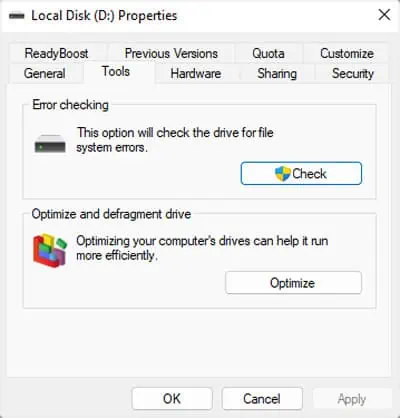
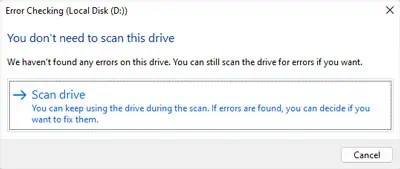
Windows provides an option to check a disk or drive in its properties. It is the default way you may run this process through a graphical interface. However, this process can not perform a hardware-level scan. It only checks the file system structure, linkage, and records as well as security descriptors on the disk.
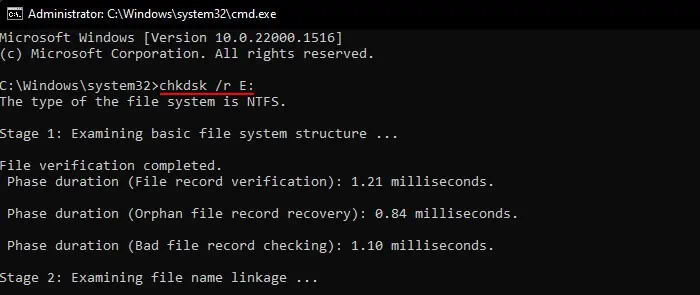
Another way you may scan or check a disk on Windows is byusing the CHKDSK command. Unlike with the above process, you get many options while using this command-line method. It is because you need to use different optional flags along with the command to check a drive and individual flags specify different options.
You also need to specify a disk while using the command. Otherwise, it will check the system drive (usually C:).
you may also use this command on the Windows Recovery Environment’s Command Prompt. However, the drive letters will be temporarily reassigned in this case. So, you need to determine the drive letter first. The complete process is as follows: