BIOS settings can get corrupted abruptly or after tinkering with some advanced options. If you’re experiencing system instabilities due to bad overclocking or after the addition of incompatible hardware components, restoring it to factory values often solves it.
Users who can access the BIOS interface should look forLoad Optimized Defaultsor similar indications. But ifthere’s no display at allor the earlier method doesn’t help, you need toclear CMOS. This involves using theCLEAR CMOS button, reseating theCMOS battery, or shorting theRTC pinswith a jumper.
After working on a plethora of systems, our team has noticed variations regarding the location of the CMOS battery / clear CMOS button and even the number of RTC pins. Even though the general idea to reset BIOS remains identical, theexact process can differ depending on the motherboard.
Via UEFI/BIOS Utility
The first thing you should try is accessing theUEFI/Legacy BIOSUtility. Just hitDel,F2, or an appropriate key when your PC reaches the splash screen. In most systems, the dedicated one should be displayed right below the manufacturer logo.
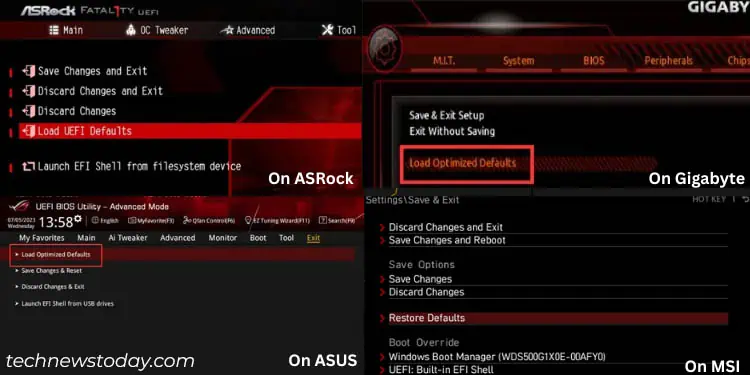
Once you haveentered the BIOS interface, there are two possible ways to quickly restore your motherboard’s firmware to default. Here’s a brief overview of the first method:
While the aforementioned steps are already simple, the second method involves utilizing a directshortcut key to load the optimized defaults. This makes the resetting BIOS process a breeze.
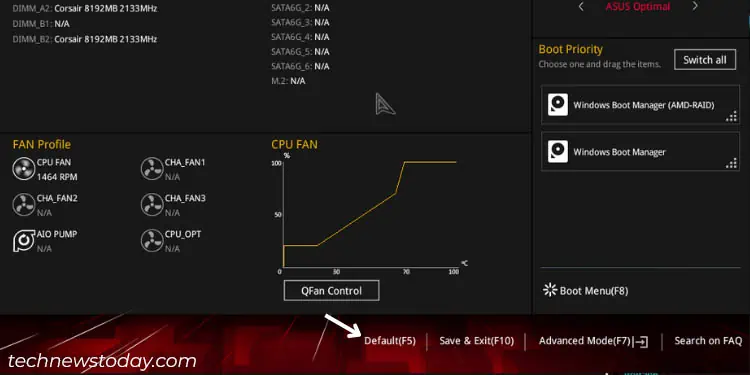
However, the dedicated key differs for every motherboard brand and also varies for Legacy users. Some manufacturers have even included this within the EZ mode. Once you select the relevant option, the same dialogue box will pop up as discussed above.
Press the Clear CMOS Button
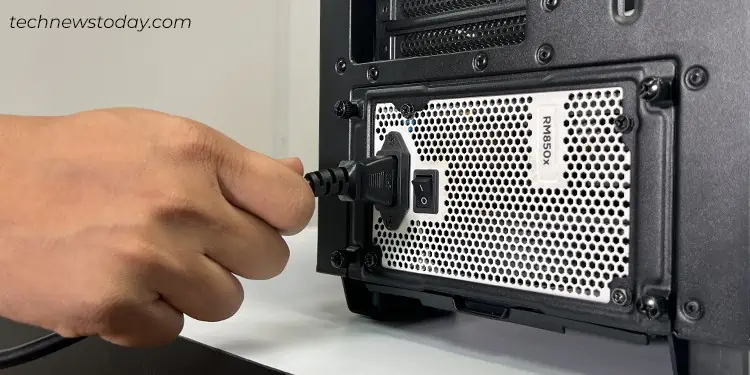
Resetting BIOS via the UEFI utility is quite straightforward. But what if yourPC can’t even boot to BIOS? In such scenarios, clearing CMOS (Complementary Metal Oxide Semiconductor) values should suffice.
The dedicatedNVRAMorRTC RAMchip holds all the low-level settings that power up the motherboard and start thePOST (Power On Self Test). Once you press the dedicatedCLEAR CMOSbutton, the power supply is temporarily interrupted which causes thechip to lose the stored BIOS configuration.
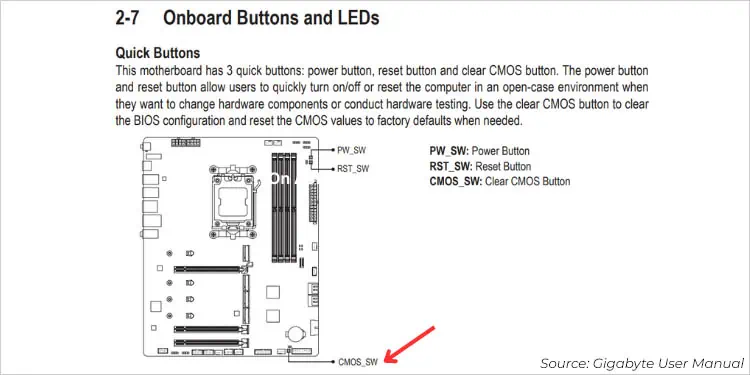
The button’s location can vary depending on the motherboard. When I tried clearing CMOS on Gigabyte’sTRX40 AORUS MASTER, it was presenton the I/O shield. However, it was located as a‘smart’ switchon ASRock’sX570 AQUA.
TheCLEAR CMOSbutton is only available on newer motherboards (on both mid-end and high-end). However, you may not find it if you’re using an older system. In that case, considerremoving the CMOS batteryand reseating it.
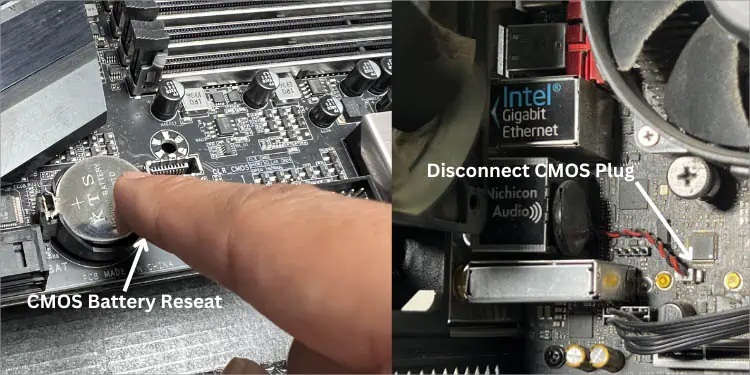
Well, this is one of the traditional ways to reset BIOS and is still preferred by most professionals. In fact, this techniquealso works on most laptopsif it possesses an on-board 3V battery.
Unlike the physical CMOS clear switch, you need to access the mainboard to find the coin-shaped cell. The exact location varies based on the manufacturer and the motherboard’s form factor.