For general users, engaging with BIOS settings isn’t something you do every day. But when you encounter error messages after POST or your system becomes unstable following the installation of new components, you’ll have to address these issues on your ASUS firmware interface.
Even though the BIOS appearance inROG,TUF GAMING,PRIME,ProArt, and other series differ slightly, the available options remain identical. you may make changes from basic to advanced settings, likeboot/storage management,power configuration,processor/memory overclocking, and more.
Catering to your needs, I’ve compiled a detailed guide that covers all the essential settings when setting up ASUS BIOS for the first time.

Basic BIOS Configuration
Let’s begin the setup by examining and tweaking the most basic settings first. This section covers everything you should know about the latest UEFI interface, changing setup modes, monitoring hardware/BIOS information, tweaking date/time/language, and more.
The easiest method involves starting/restarting your computer andspamming the Del or F2 key(depending on the model). In some, both should work.In case that doesn’t work, you may check out our detailed article onentering asus bios.
Switching Between EZ and Advanced Modes
After entering BIOS, you’ll either end up in the EZ or Advanced mode. Quickly check this next to theASUS/TUF/ROGlogo.
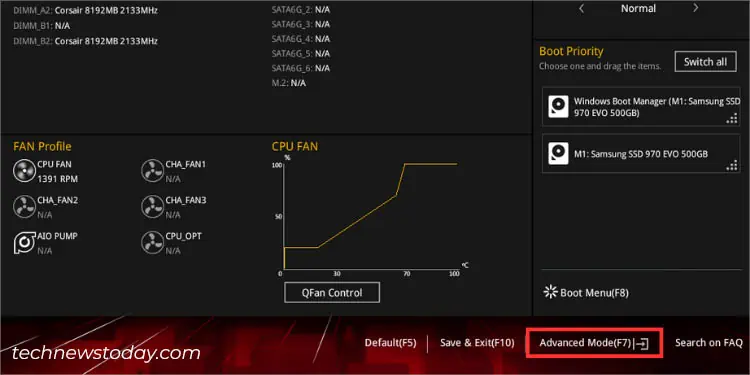
As the name suggests, EZ lets you easily view the system information and tweak the most basic settings. But if you’re going for more sophisticated options for better configuration of your ASUS system,use F7 to quickly switchto Advanced mode.
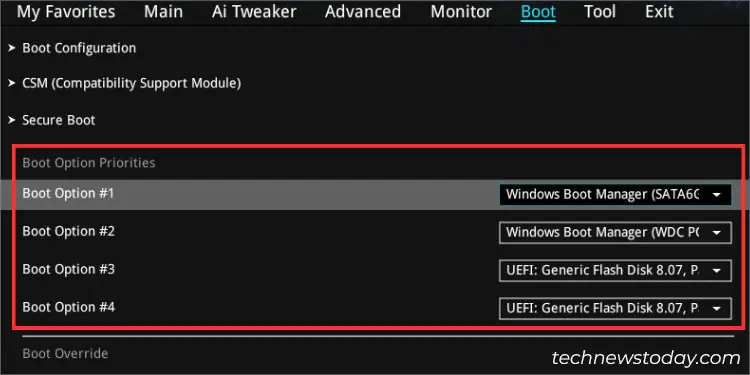
By default, most ASUS systems will start the EZ mode after thePOST is completed. However, you may permanently change this fromBoot>Setup Mode.
Retrieving BIOS Information
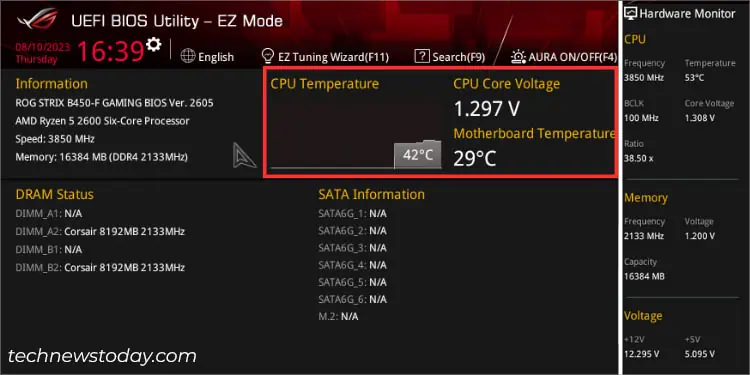
Oftentimes, we need to know specific information about our BIOS and even the connected components. These may include themotherboard’s model,installed CPU,BIOS version, SATA/M.2 information, DRAM status, etc.
In EZ mode, you may look up the dedicated sections (as demonstrated in the figure) to retrieve the details. On the other hand, theDRAM and SATA statusgives you a clear idea of which slots/headers your components are connected to.
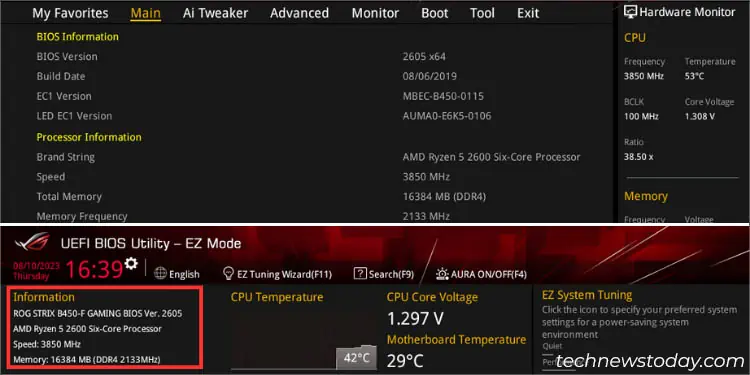
Users in Advanced Mode can even get a detailed overview of theirBIOSandProcessor informationin theMainmenu.
To ensure all your system components are working optimally, you may get a quick insight from the BIOS settings itself