Whether you are installing a fresh RAM orupgrading a previous one, the steps to install RAM are fairly similar.
You simply need toaccess the motherboard,locate memory slots, andinsert the sticksin the correct slots. The last part is where most users get things wrong.
But before everything else, ensure you’ve chosen theright RAM stick for your system.

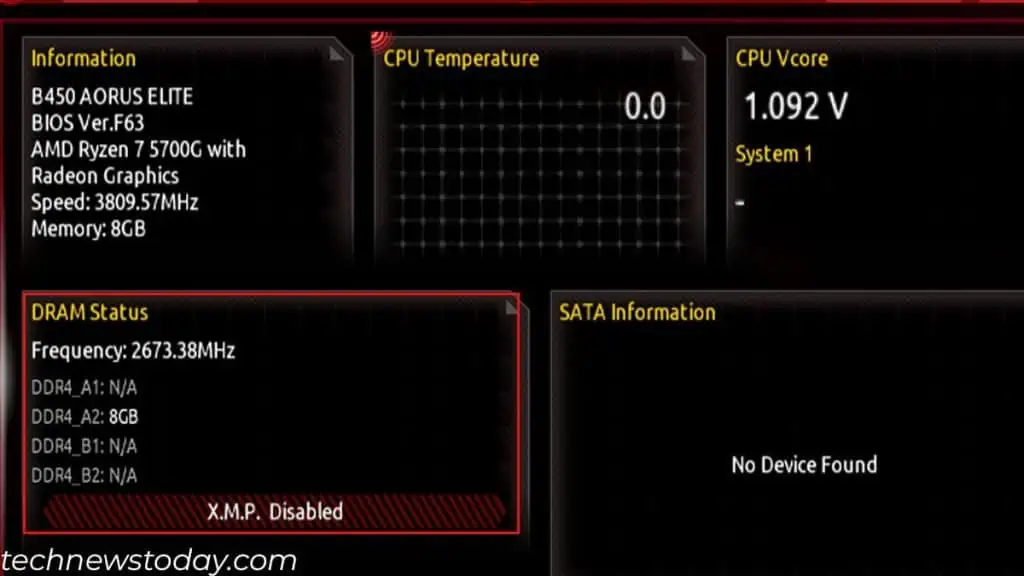
Also, note that inserting the memory module on the wrong slots candrastically affect system performance. And using the correct slot helpsenable dual-channel mode, which almost doubles the overall memory bandwidth.
Keeping these things in mind, let me guide you on how to install RAM correctly.
If you are upgrading your memory, you first need toremove the side panelto access the motherboard.
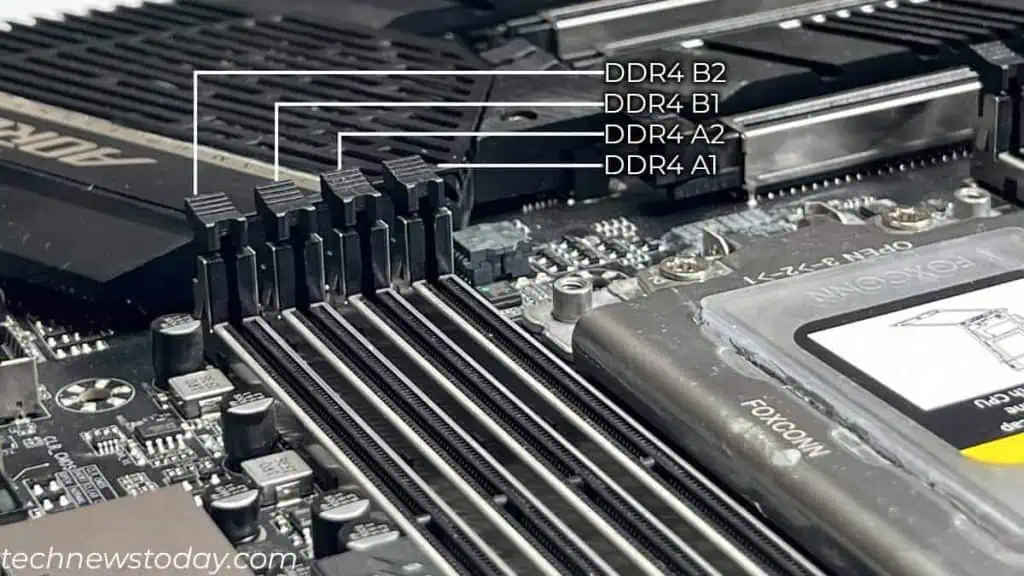
Once you have access to the board, check for DIMM slots. These are located near the CPU socket.
In case you have already installed a bulky CPU cooler, the memory slot may be blocked. If so, you might need toremove the coolerfirst to access the slots.
Most consumer-level motherboards havetwo or four memoryslots. you may also find 8 or 16 slots on the workstation or server-class motherboard.

To get the most out of your RAM, you need to utilize the correct DIMM slot.
Choosing the Right Memory Slot
Installing a memory stick on an incorrect slot means both RAM will act as a single stick or single channel.
This means the CPU will only use one channel to access both these RAMs. The CPU can access both these RAMs simultaneously when placed correctly.
Depending on the memory slots used, your system will either run onsingle or dual channels. Quad or Octa for server-level motherboard. Multi-channel setups are much faster and have more bandwidth than single channels.
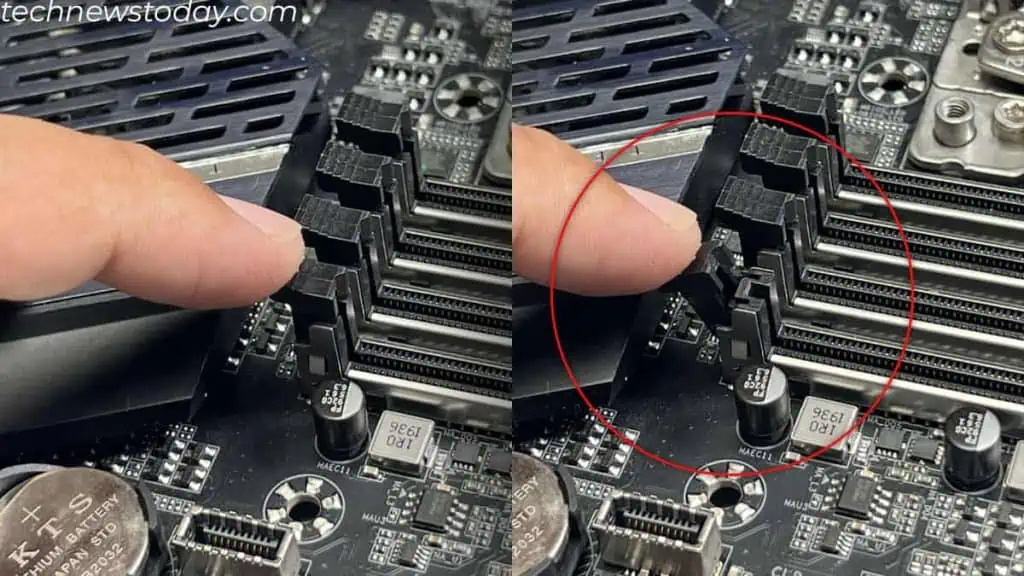
So if you are using multiple memory sticks, you need to insert RAM in the correct slots.