If you feel like you’re not getting the full performance out of your Gigabyte system, one of the first things you should check is the XMP setting in your BIOS. Think of it as a one-click overclocking tool for running your RAM at higher speeds.
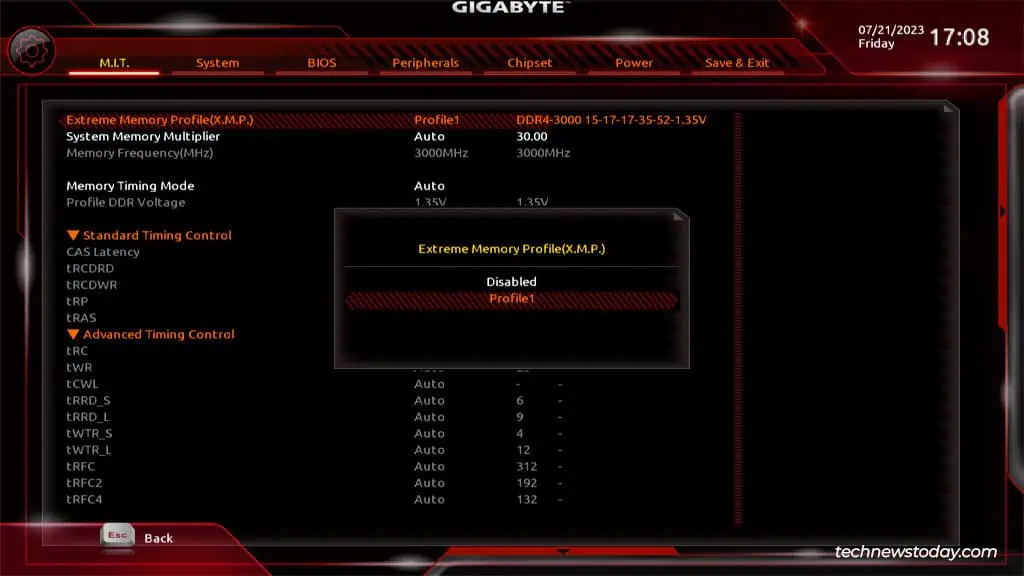
You canenable an Extreme Memory Profile (XMP)from theAdvanced Memory Settingssection, or from theTweakertab in the BIOS. On some Gigabyte boards, this setting might also be labeled asEOCP(Extended Over Clock Profiles). On newer AM5 socket based Gigabyte boards, this setting might also be labeled asEXPO(Extended Profiles for Overclocking).
As XMP is preconfigured with tested values, you may generally utilize the profiles without a hitch. But on a couple of systems that I tested, the profiles set the RAM frequency higher than what was supported by the CPU. This ultimately meant that the config reset and XMP didn’t work.
Check XMP Compatibility
To ensure you don’t encounter any compatibility problems like the one I mentioned above, you could verify thatyour components support XMPfrom the product’s specifications page.
The motherboard and RAM obviously need to be XMP-capable. Additionally, your CPU must also support the RAM frequency defined in the profile.
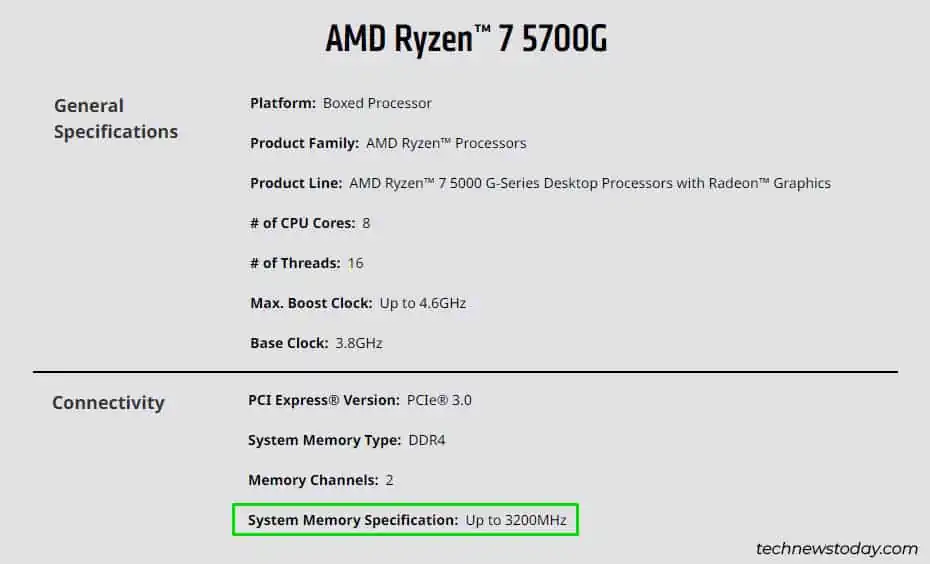
That last part is a bit tricky. For instance, my Ryzen 7 5700G is rated to support RAM speeds up to3200MHz. High-performance DDR4 modules are commonly rated to speeds like3600MHzor4133MHz.

After testing XMP on multiple systems, I found that some CPUs (including my own) would work smoothly with higher frequencies like4133MHz. Others would only support theofficially supported frequencies or lower.
The takeaway here is that if XMP sets the RAM frequency to a value supported by your CPU, you may enable it without worrying. But if it sets the frequency to a high value, yourCPU may or may not support it.
If the XMP config is not supported, it may revert back after restarting. If that doesn’t happen automatically and your PC fails to boot, you canreset the BIOS manuallyto set everything back to default.
While there are various ways to set up XMP,doing so via the BIOSis the standard method. On Gigabyte boards, pressDel/F2when booting to access theBIOS/UEFISetup utility.
Alternatively, you may also restart your PC 3 times consecutively to boot to the recovery environment. There, you can selectTroubleshoot>Advanced Options>UEFI Firmware Settings.
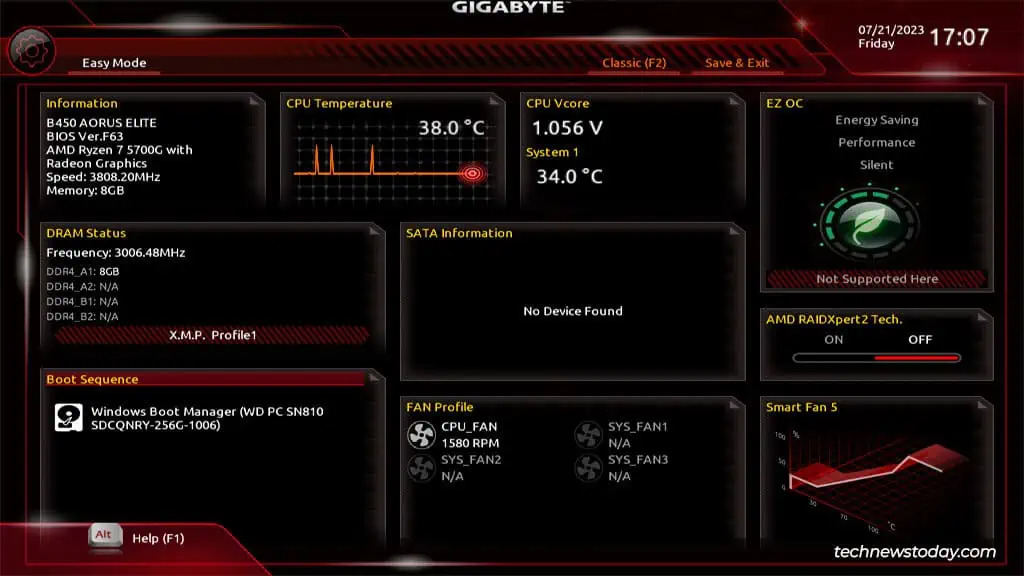
The Gigabyte BIOS has two UIs that you may switch between with theF2key –Easy ModeandAdvanced/Classic Mode.
InEasy Mode, you may set up XMP from theDRAM Statussection.
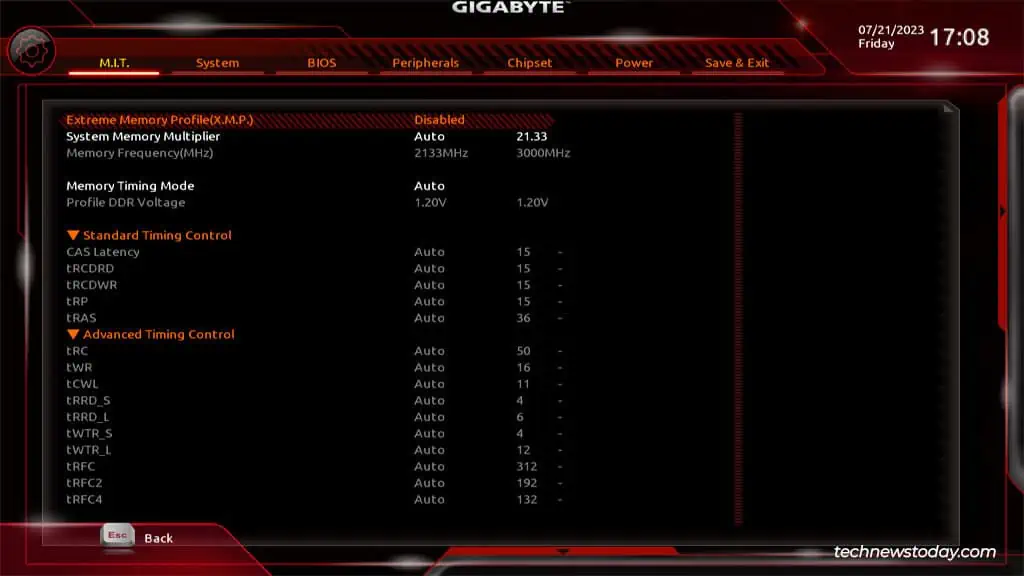
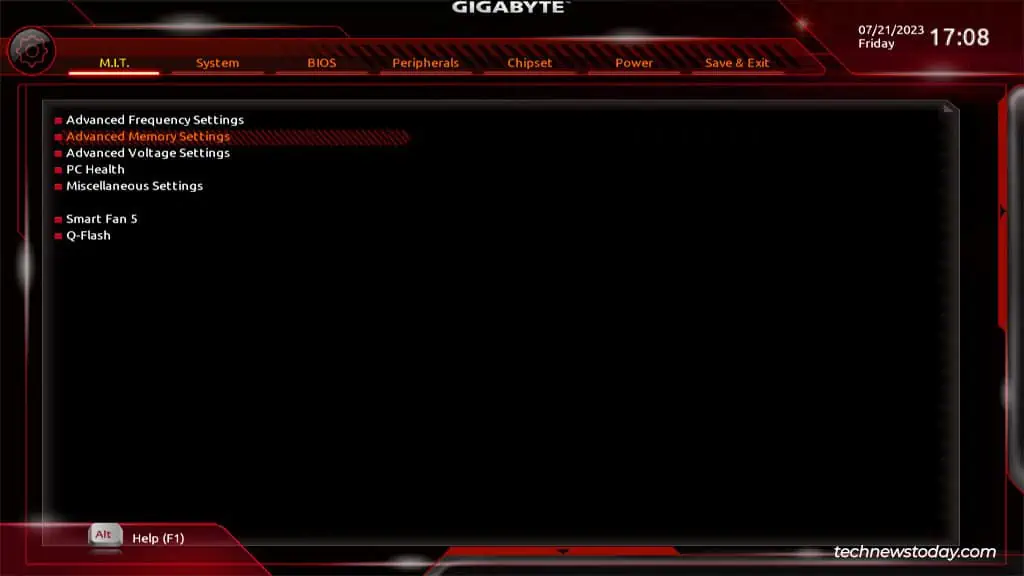
While this is convenient, most users should set up XMP fromAdvanced Modeinstead as that gives you a much better idea of what you’re doing. InAdvanced Mode,go to theM.I.T.tab and openAdvanced Memory Settings.