I once got theAMD-V is disabled in the BIOSerror when I tried to launch a VM. I also often see people unable to assign multiple cores to their VMs. These are common problems that happen because hardware virtualization isn’t enabled in the BIOS.
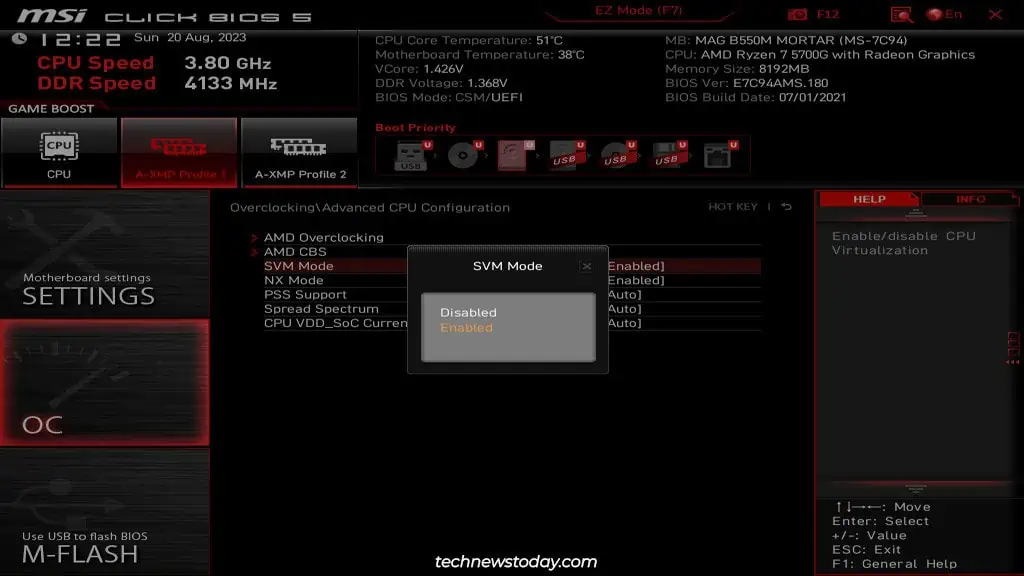
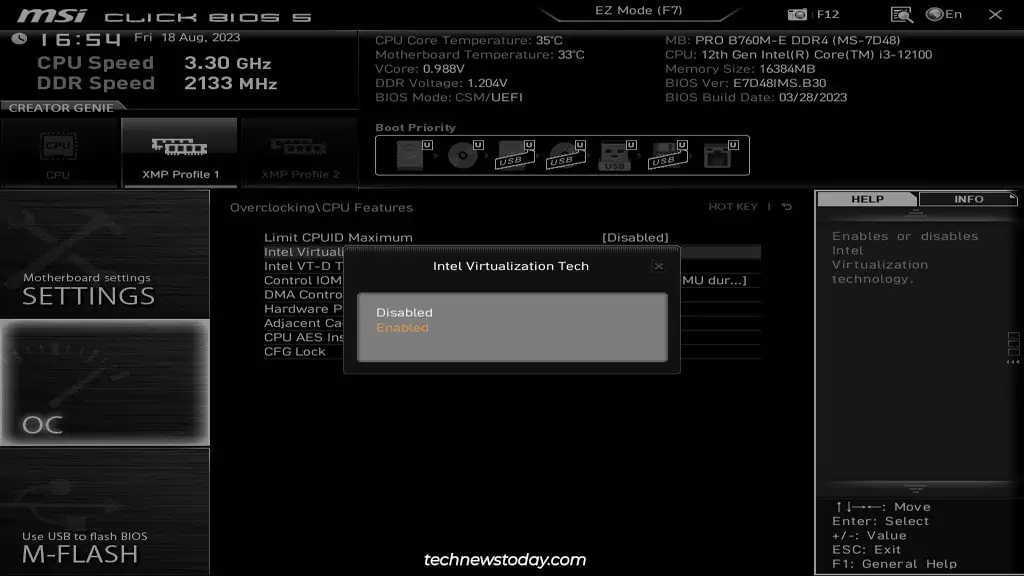
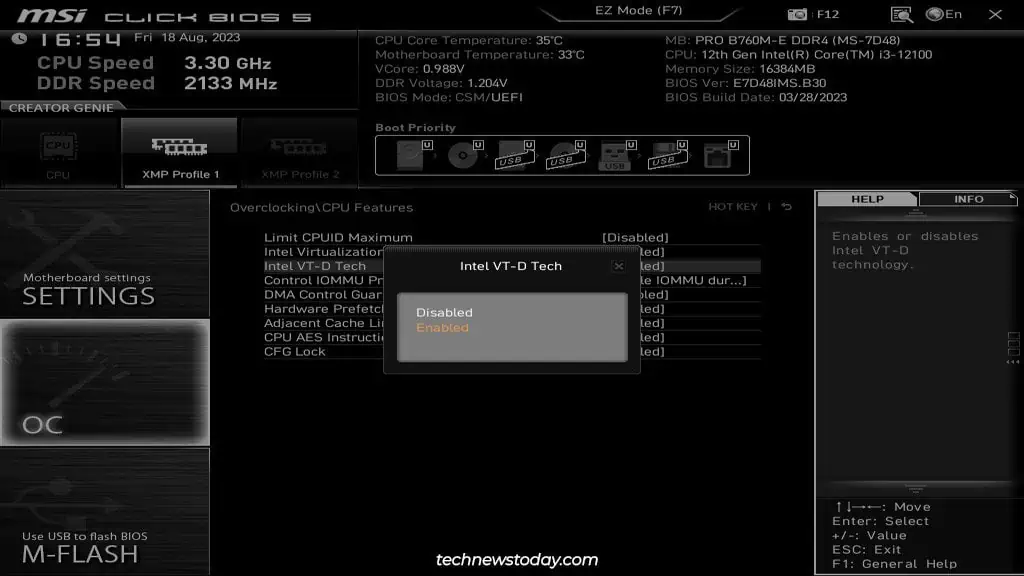
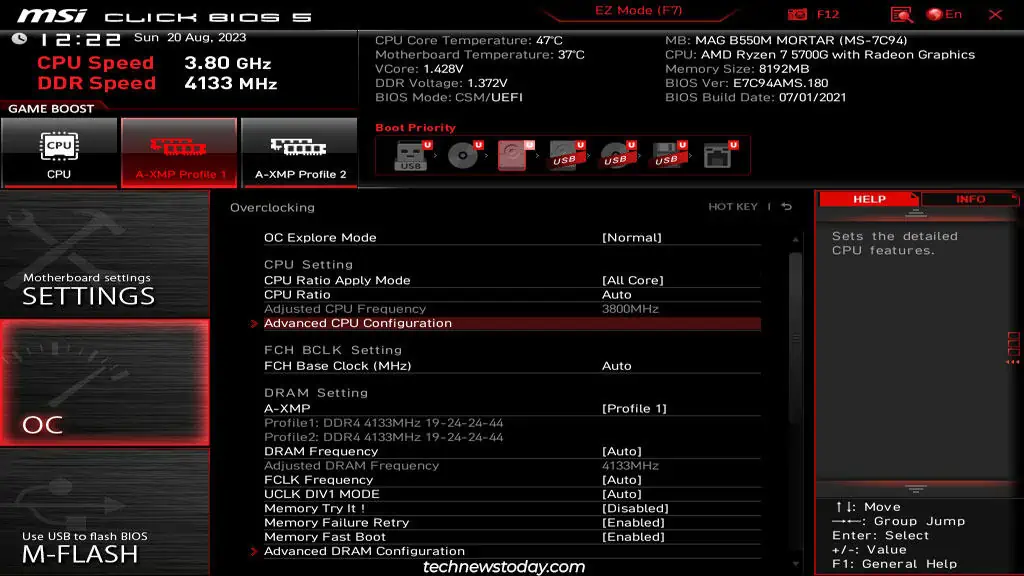
On most MSI boards, you may enable AMD’s virtualization tech (SVM) from theAdvanced CPU Configurationtab. Similarly, you’ll find Intel’s virtualization tech (VT-x) in theCPU Featuressection of the MSI BIOS.
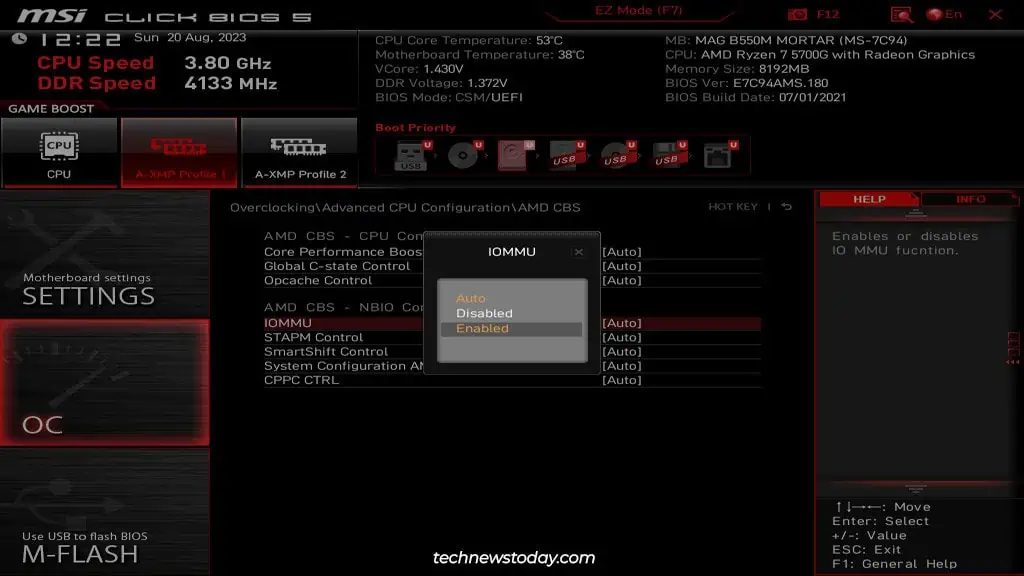
These options’ locations in the BIOS can differ on certain MSI boards/BIOS versions, which can complicate things for some users. So, I’ll cover the entire process for enabling virtualization in the MSI BIOS in this article.

You’ll need toaccess the MSI BIOS interfaceto set up virtualization. The easiest way to do this is bypressing the BIOS key (Del/F2)at boot.
If the BIOS key doesn’t work (a common drawback ofFast Boot), you may utilize the Restart button to reboot your PC 3 times in a row. This’ll boot your system to WinRE.
There, you may selectSee advanced repair options>Troubleshoot>Advanced Options>UEFI Firmware Settingsto enter the MSI BIOS.
Enable Virtualization In BIOS
First, ensure you’re in theAdvanced Modeof the MSI BIOS (pressF7to switch).
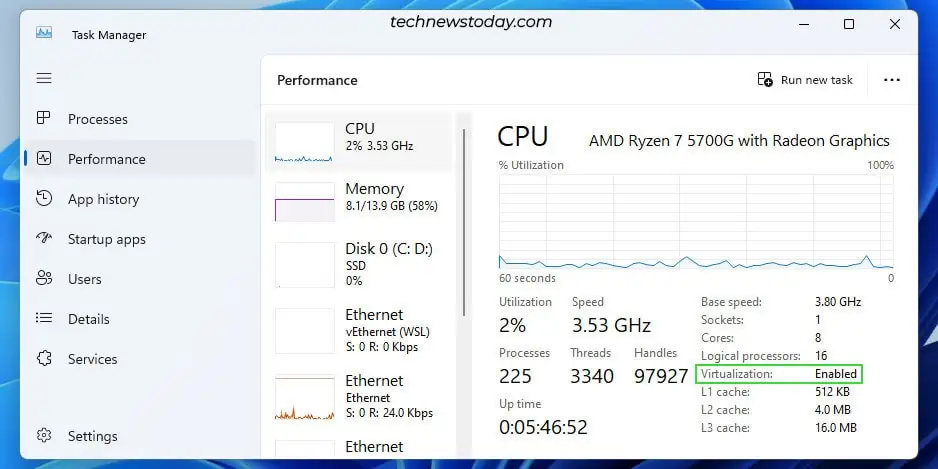
Check Virtualization Status In Windows
After exiting the BIOS, the PC should boot to Windows. You have multiple ways to confirm that you properly enabled hardware virtualization.
And before I end, we’ve got in-depth articles on topics like installing Windows 11 on VirtualBox or using VMware in general. If you’re just getting started with virtualization, these are worth a read.