A lot of users can’t find the hardware virtualization option in the BIOS interface as its name and location differs depending on the processor type andBIOS version.
In Gigabyte’s case, it’s usually calledSVM(AMD) orVT-x(Intel) and can be configured from theChipsetorAdvanced CPU Settingssections.
I’ll cover the steps to do this on different GigabyteBIOS/UEFIinterfaces in this article.

Access BIOS/UEFI Interface
To enable Virtualization, you’ll need toaccess your BIOS settingsfirst. PressF2/Delwhen booting to enter the Gigabyte BIOS Setup utility.
If you’veenabled Fast Bootand the BIOS key doesn’t work, you may use an alternate method to get to the firmware interface.
Restart your PC 3 times in a row to boot to the recovery environment. Then, selectTroubleshoot>Advanced Options>UEFI Firmware Settings.
Locate Virtualization Option
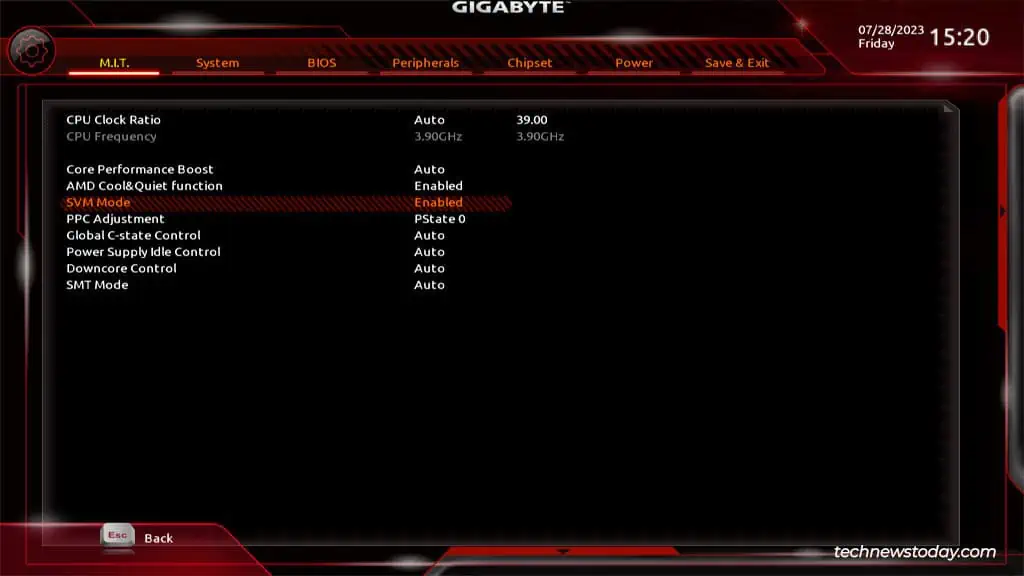
PressF2(if required) to switch toAdvanced Mode. As mentioned earlier, you’re looking for an option namedSVM(AMD) orVT-x(Intel) here.
Currently,older Gigabyte boardsuse the classic black-and-red UI, while the latest ones come with the revamped orange/yellow UI released in 2020.
On the old UI, you may manage the virtualization setting from the locations listed below:
With the new UI, you may find the virtualization option in the following locations:
Enable Virtualization on Gigabyte
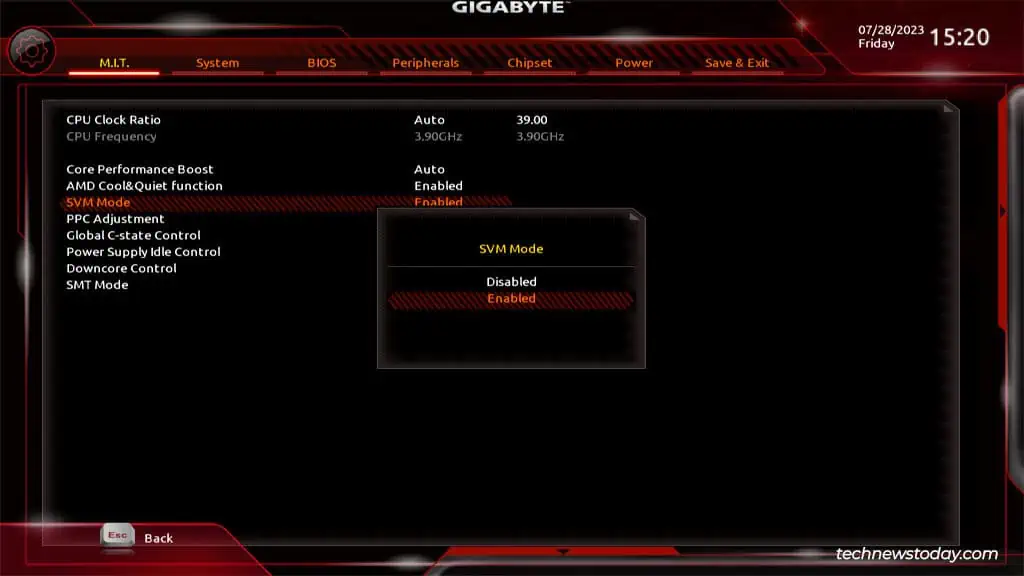
Once you find the virtualization option, all you need to do is set it toEnabled.
If your CPU supports it, you may also enable the PCI passthrough feature. AMD calls itIOMMUwhile Intel calls itVT-d.