You possibly won’t be able to runHyper-Vor third-party virtual machines likeVMware Workstation/VirtualBoxon your ASUS system without configuring the related settings on BIOS.
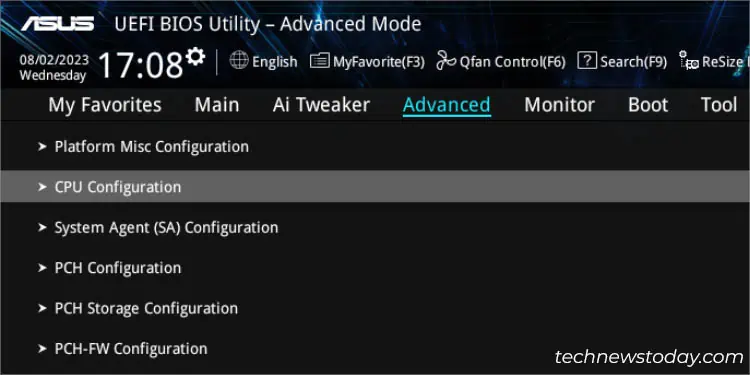
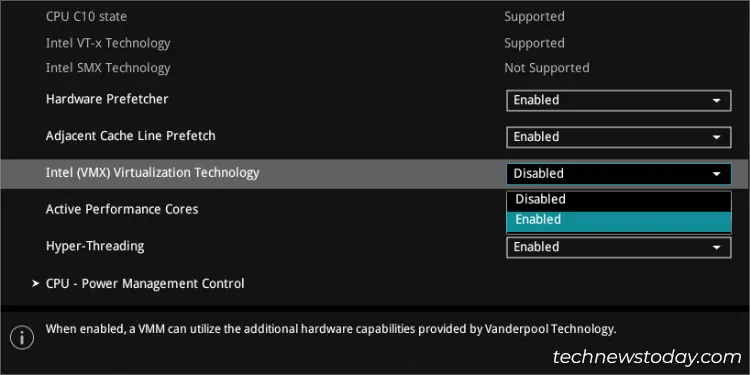
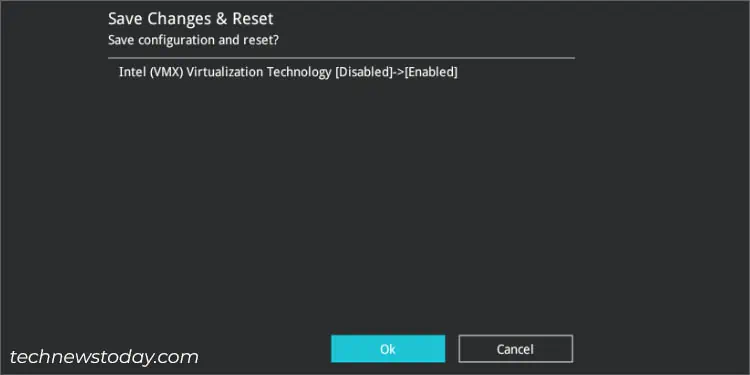
To enable virtualization, navigate toCPU Configurationin the Advanced tab. Intel users can look forIntel Virtualization TechnologyorVMXoption while those with AMD processors should findSVM Mode. Just expand the drop-down, set it to Enabled, and save the settings.
Recalling my first attempt to use Ubuntu on VMWare, I couldn’t start the virtual machine even after properly setting it up. I got the “This host supports AMD-V, butAMD-V is disabled” error and to solve this, all I had to do was tweak a simple setting on BIOS. Since then, I have been able to emulate multiple operating systems on myROG STRIX B450-F GAMINGPC without further issues.
Check Processor Virtualization Support
Even though most modern motherboards include the virtualization setting within the BIOS settings, itmight not workif your processor is incompatible.
Here, at our TechNewsToday workplace, all of our Intel and AMD processors support this feature. We have had no complaints from any authors and editors when using virtualization on their ASUS laptops or PCs.
But this might not be the same case for everyone. For that reason, it’s a good idea to first confirm whether your CPU supports it or not.
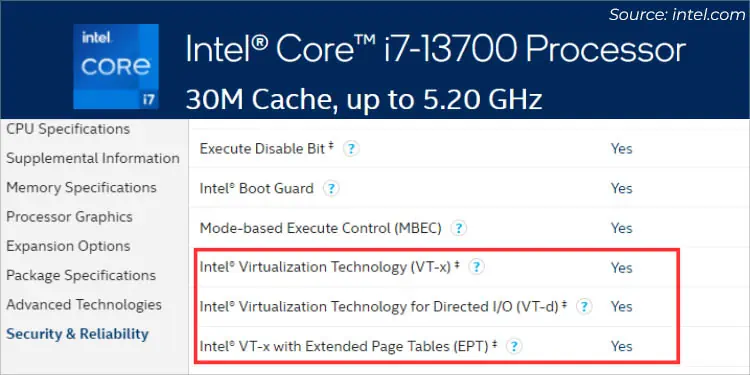
If you’re a Team Blue, you may directlycheck your processor’s specifications. Identify whetherIntel Virtualization Technology,VT-x,VT-d,VT-c, or similar terminologies are included there.
Another way is to download and install theirProcessor Identification Utility. Launch it and verify if therelated option has a checkmark.
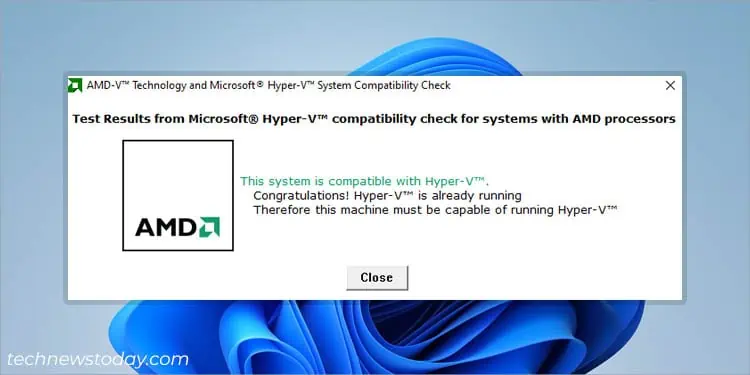
On the flip side, Team Red users do not require digging around their online specifications page as AMD hasn’t included anything related to virtualization, SVM Mode, or AMD-V there. Instead, I suggest downloading theirAMD-V Technology and Microsoft Hyper-V System Compatibility Checkutility.

All you have to do is extract the zipped folder andrun theamdhyperv.exefile. It will automatically show whether your system supports Virtualization and Hyper-V, as demonstrated in the above snap.
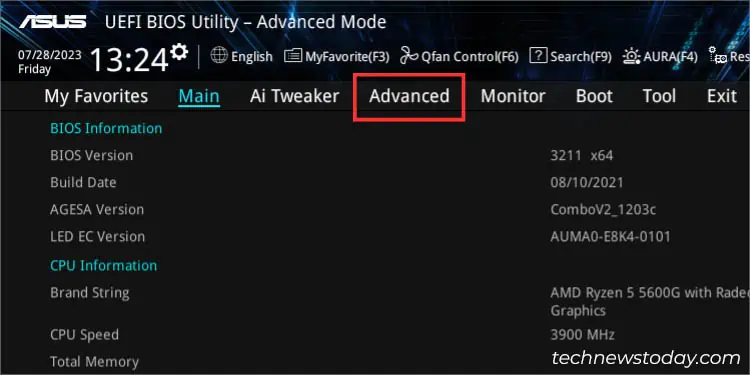
Access ASUS BIOS Utility
After confirming compatibility, it’s time to enterUEFI/BIOS screen on your ASUS PC. Just start/restart the computer andspam the Del keyas soon as you press the power button.
However, some ASUS models use F2. So, if Del doesn’t work, reboot the computer, and this time,press F2as soon as you encounter the firstROG/ASUS/TUFlogo.
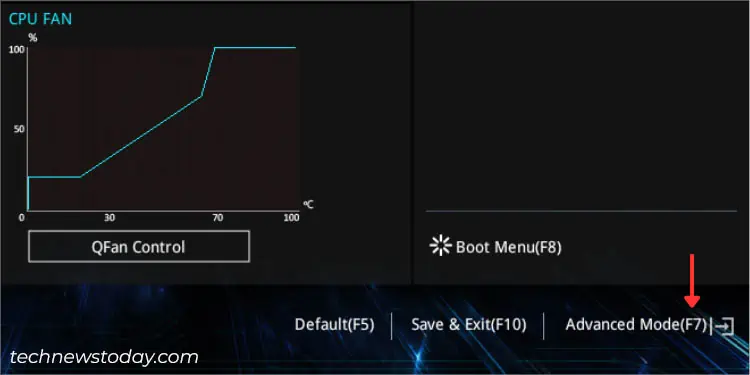
Navigate to CPU Configuration in Advanced Mode