Gigabyte’s BIOS UI has seen multiple updates in the last few years. Naturally, this has led to some confusion when users need to locate certain settings like TPM.
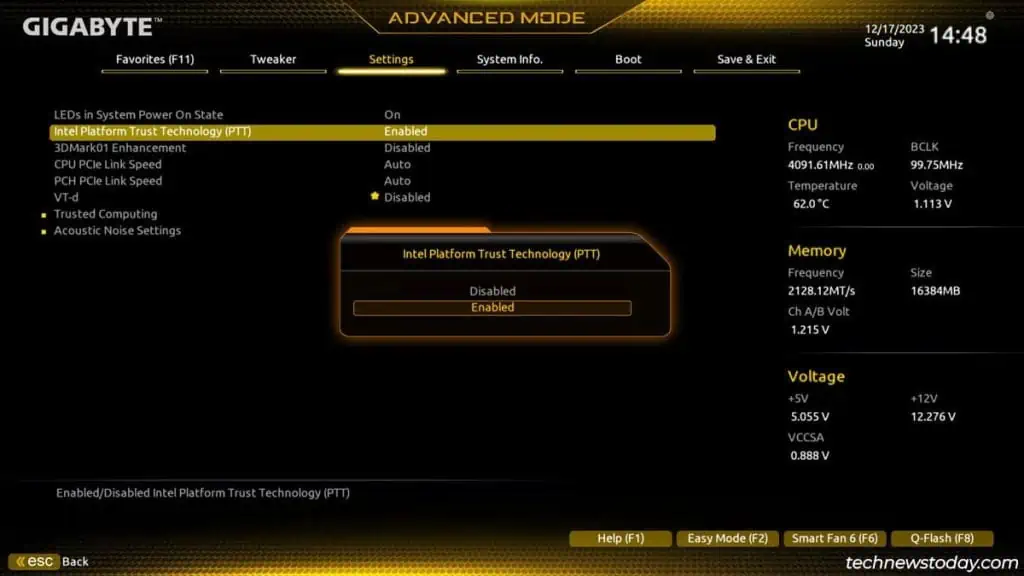
OnIntelboards, you may enablePTTfrom theTrusted Computingtab.
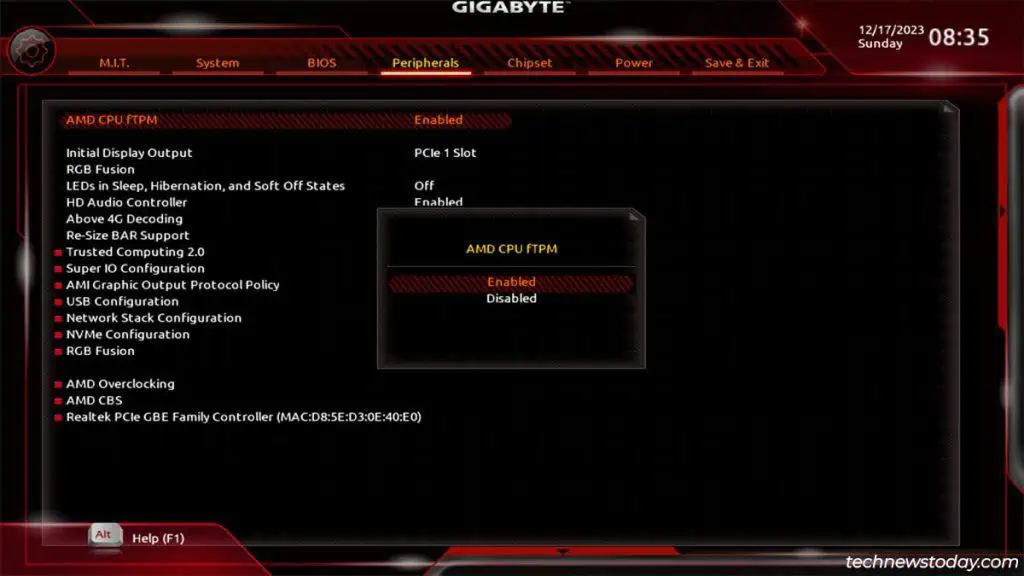
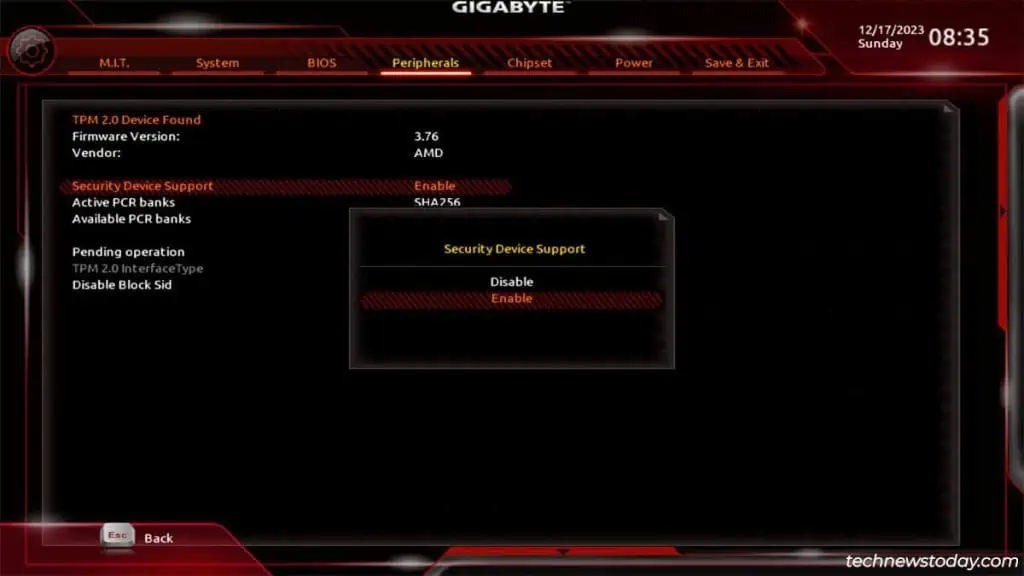
OnAMDboards, you may configurefTPMfrom thePeripheralstab.

Once youenable TPM, you should verify that it’s ready for use in Windows. I’ll provide step-by-step instructions for this entire process in this article.
Enter the Gigabyte BIOS
Turn on your PC and repeatedly pressDelorF2toaccess the BIOS setup utility.
Sometimes, theBIOS key may not workdue to features likeFast Boot. In that case, use another method like WinRE or Gigabyte’s app toboot to the Gigabyte BIOS.
Enable TPM in the BIOS
In the BIOS, use your mouse or press the key shown on the screen to switch toAdvanced Mode. This will be theF2key on most Gigabyte systems.
On Gigabyte boards withIntel processors,
On Gigabyte boards with AMD processors,

you may also set theTPM device versionor manage advanced settings likePCR BankandPlatform Hierarchyfrom the BIOS. But those are usually best left to default. As for resetting TPM, I recommend doing it from Windows instead of the BIOS.
Check TPM Status In Windows
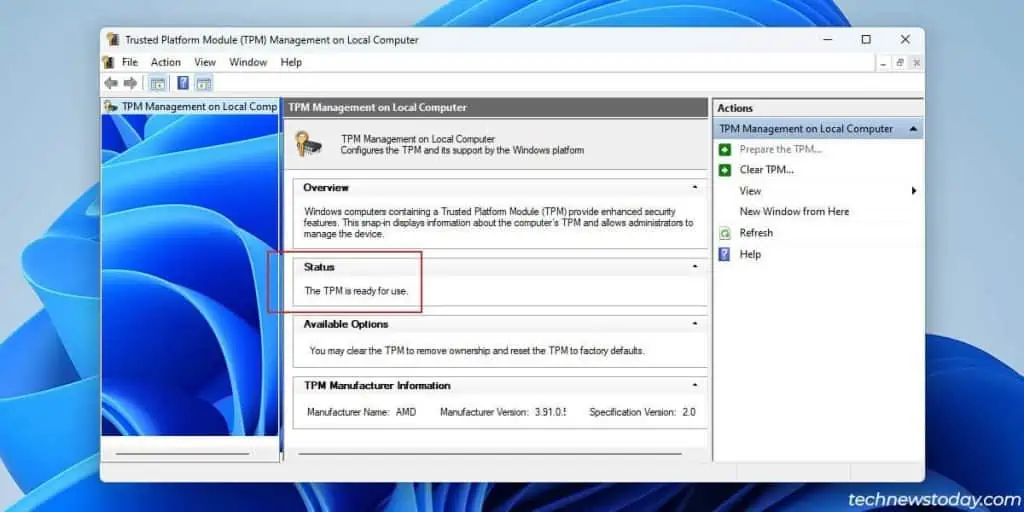
After you exit the BIOS and restart, the PC should reboot to Windows. PressWin + Rand entertpm.mscto access the TPM Management Console.
The TPM status should be “The TPM is ready for use.” This confirms that you successfully enabled TPM.