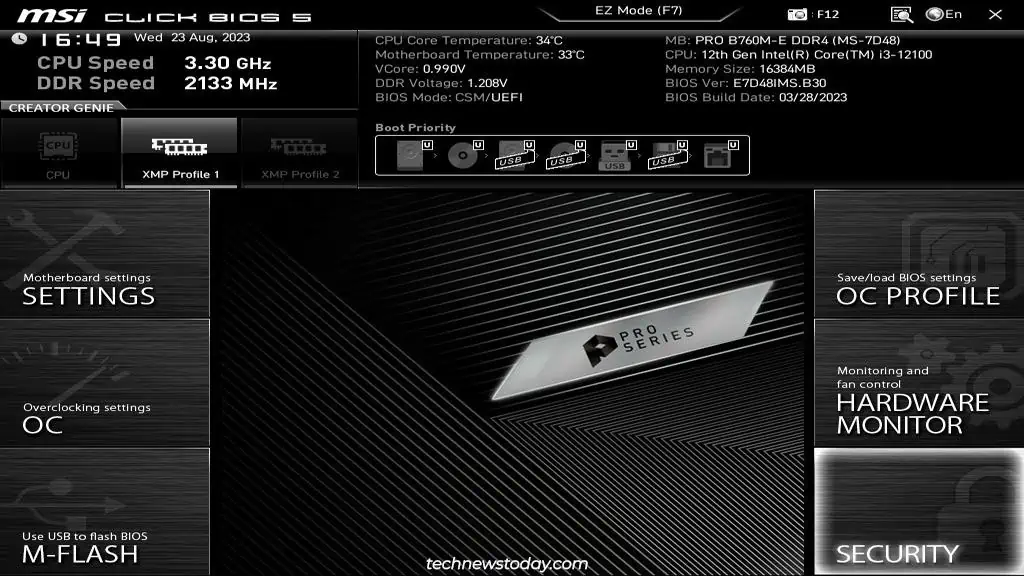
Most modern MSI boards support TPM 2.0 in the form of a discrete hardware chip (dTPM) or through firmware-based implementations likefTPM(AMD) orPTT(Intel). As TPM 2.0 is an official requirement for Windows 11, you’ll need to enable one of these solutions toinstall the OS.
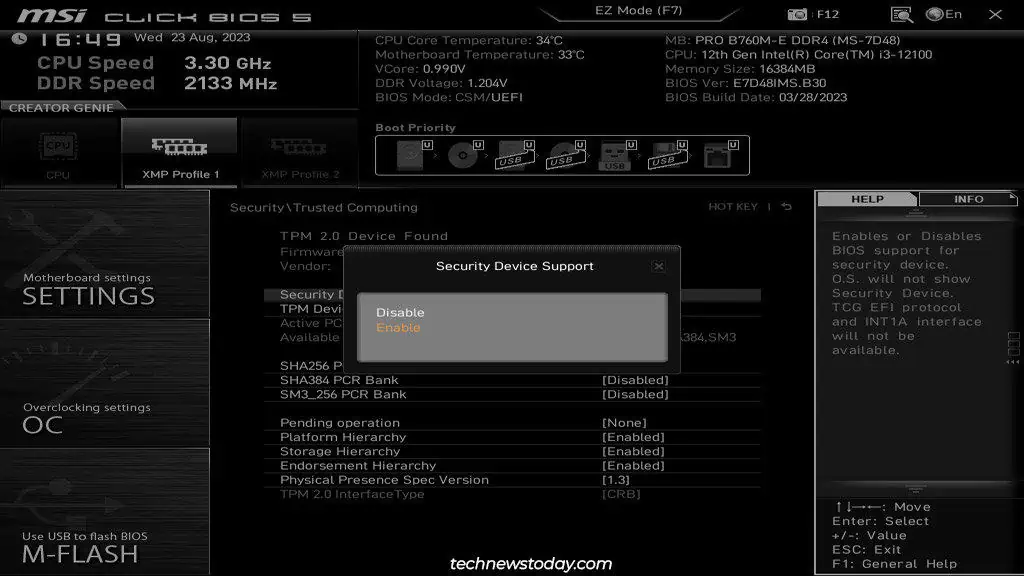
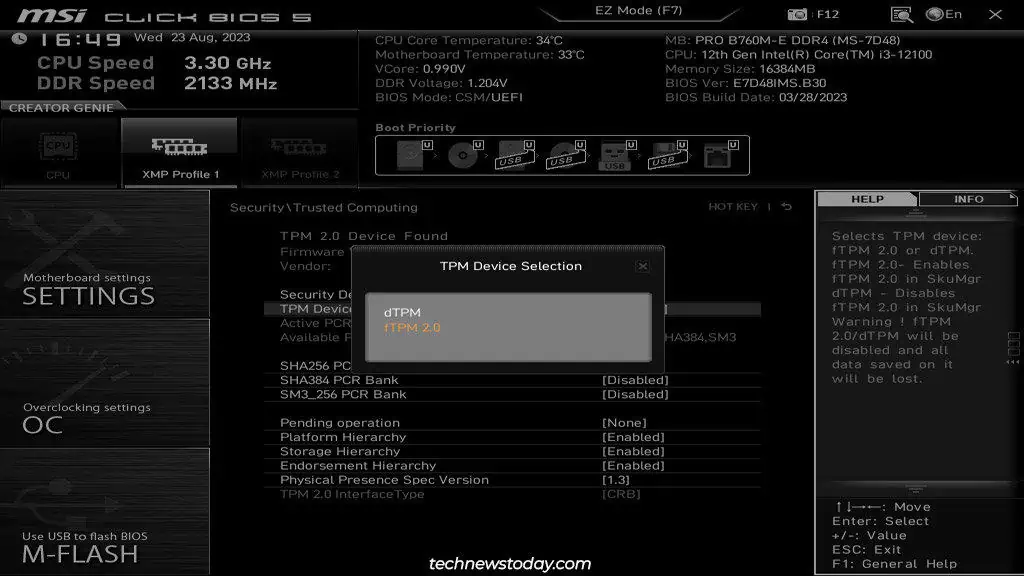
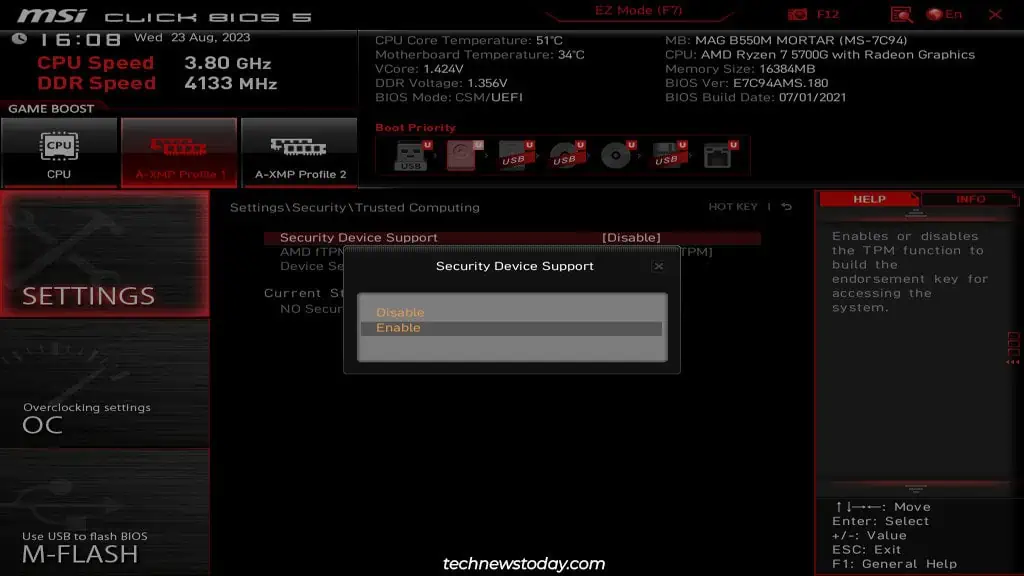
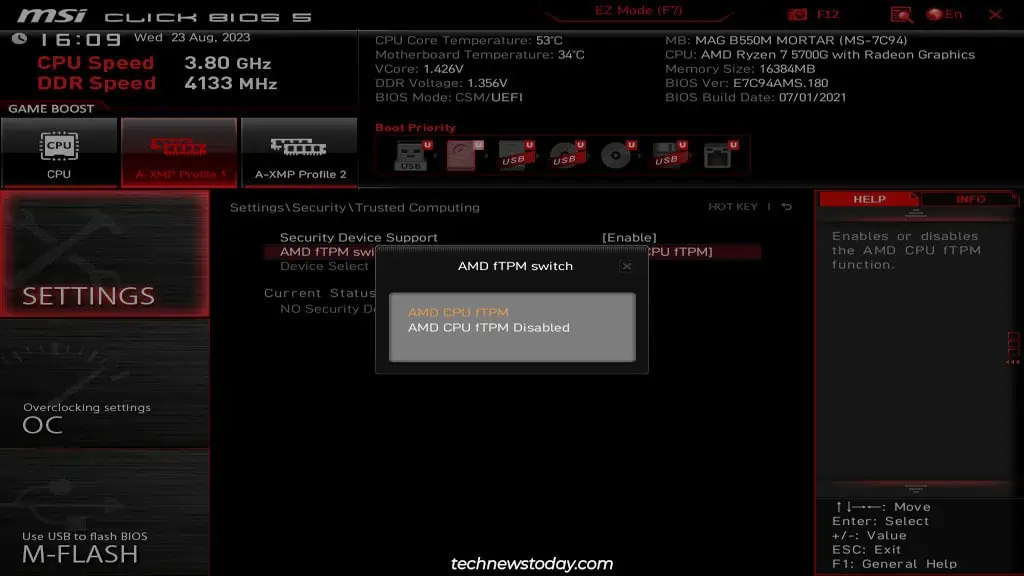
This is a simple two-step process. First, go to theTrusted Computingtab in the MSI BIOS andenable the TPM functionwith theSecurity Device Support.Then,select the TPM device to use(firmware or hardware TPM).
This went smoothly on almost all the systems that I tested. But I had an old Z87-G45 GAMING board where I had manually installed a TPM 2.0 chip. Despite enabling TPM in the BIOS, it didn’t get detected on this system. If you’re in a similar situation, I’ll cover the full steps to enable TPM and solve such issues in this article.

Access MSI BIOS Interface
Power on your PC and continuously tapDel/F2toenter the MSI BIOS.
In case you haveenabled Fast Boot, the BIOS may not show up despite spamming the BIOS key. you may use an alternate method in this case.
Reboot your PC 3 times in a row using the restart button. The system will boot to WinRE. There, selectSee Advanced Repair Options>Troubleshoot>Advanced Options>UEFI Firmware Settings.
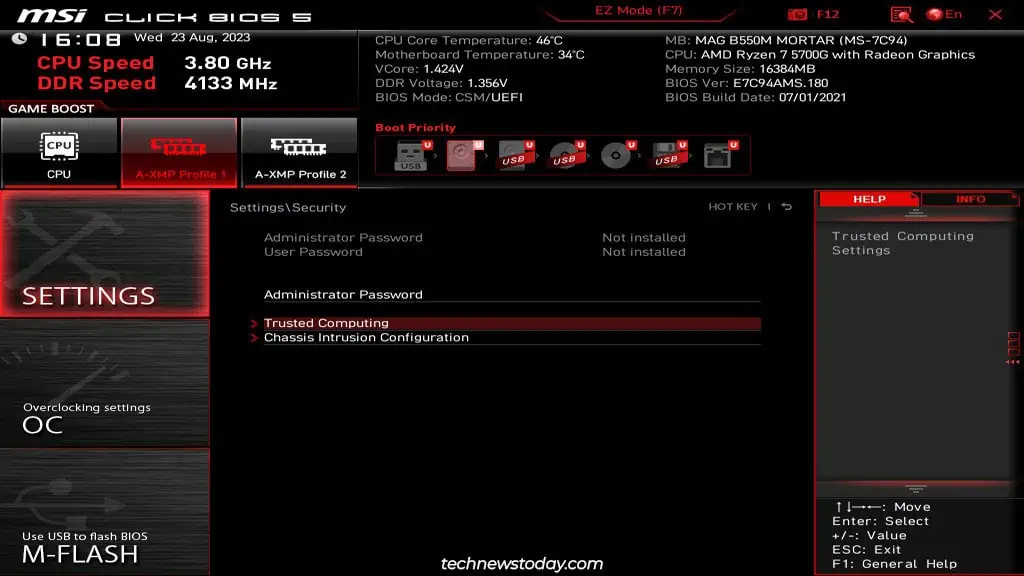
In the MSI BIOS, pressF7(if required) to switch toAdvanced Mode. Then, follow the appropriate steps to enable and set up TPM.
Depending on theexact board, BIOS, and TPM versions, you may be able to set up additional options. My B550M Mortar with TPM 2.0 only lets me set the TPM device version (which you may just leave toAuto).
If supported by your board,BIOS version, and TPM version, you may also set up advanced settings like PCR Banks, Platform Hierarchy, etc. But these are best left to the defaults.
The only option relevant to most users is thePending operation(TPM Clear) function. This resets the TPM to an unowned state, clears all TPM keys, and removes access to any TPM-encrypted data.
If you ever need to clear the TPM, I recommend doing it with OS-based utilities like Windows’tpm.mscinstead of this BIOS option.
The steps are usually the same on MSI laptops as well. But sometimes, the Trusted Computing option may be missing from the BIOS. In that case, press Right Shift + Right Ctrl + Left Alt and then press F2. This will bring up the Trusted Computing option and you may continue with the same steps as above afterward.
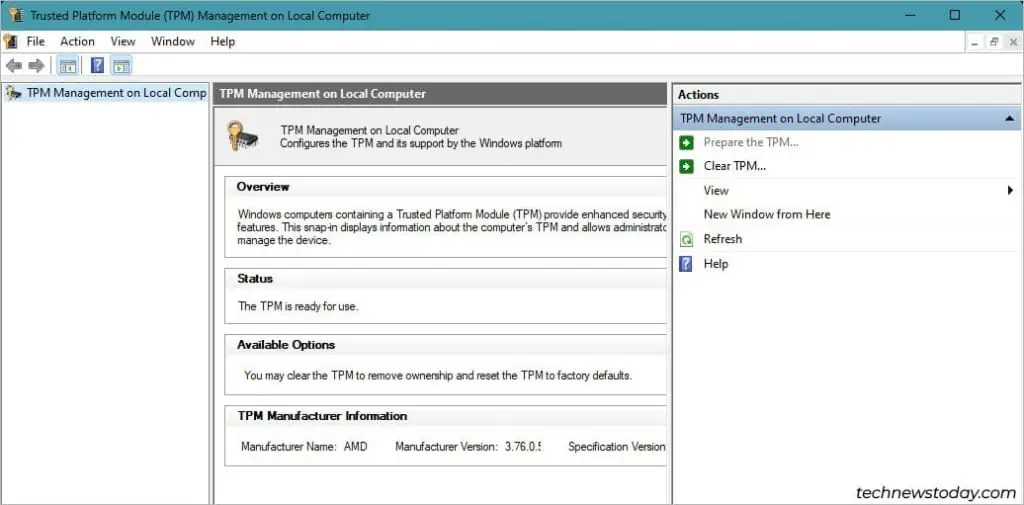
Afterenabling TPM in the BIOS, it’s important to verify that the change was successful. If you may boot to Windows, you can do this from the TPM Management Console. Press Win + R, typetpm.msc, and press Enter.
You’ll find its status asTPM is ready for use.Or if you’re trying to install Windows, you should be able to proceed without being blocked by the TPM 2.0 requirement error.
