In Powershell, you may easily enable or disable Windows Firewall using theSet-NetFirewallProfilecommand. This cmdlet is used to set up the Firewall’s advanced security settings for a particular, or all, network profile.
While you may also disable Firewall using GUI options like Control Panel/Windows Settings, doing it via CLI options like PowerShell/CMD is more efficient.
How to Enable Firewall via Powershell
How to Disable Firewall via Powershell
Remotely Enable/Disable Firewall with Powershell
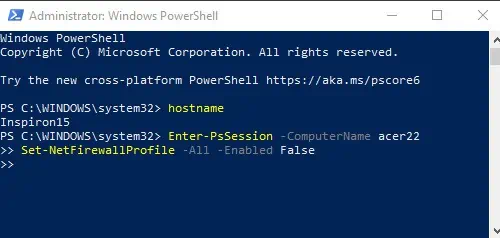
Disable Firewall on One Remote Computer
Replaceacer22with the remote computer’s name and utilize the following commands:
Enter-PsSession -ComputerName acer22Set-NetFirewallProfile -All -Enabled False
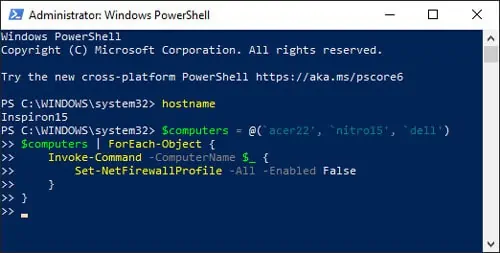
Disable Firewall On Multiple Remote Computers
Replaceacer22nitro15delland so on with the remote computers’ names and add or subtract more names as appropriate. Then utilize the following commands:
$computers = @(‘acer22', ‘nitro15’, ‘dell’)$computers | ForEach-Object {Invoke-Command-ComputerName $_ {Set-NetFirewallProfile-All -Enabled False}}

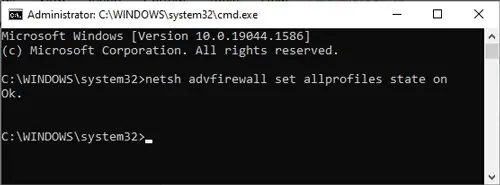
How to Enable/Disable Firewall Using Command Prompt?
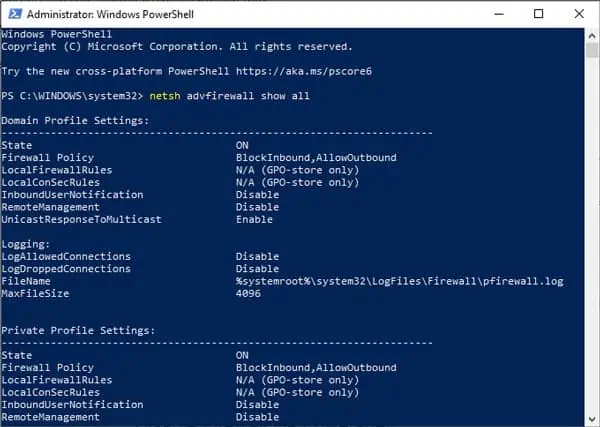
In CMD, we’ll use thenetsh advfirewallcommand to enable/disable the firewall. This command also allows for precise control of firewall rules for each of the profiles (Domain, Public, Private).
Enable Firewall via CMD
Disable Firewall via CMD