If you want to boot a modern Gigabyte board from an older MBR-partitioned drive, you’ll need to enable the Compatibility Support Module (CSM) feature first for backward compatibility. On the other hand, you must disable CSM to use UEFI features like Secure Boot.
You canenable or disable CSMfrom theBIOStab of your Gigabyte board’s firmware interface.This is generally a quick and easy process, but sometimes the CSM option might not be configurable, or it might keep resetting.
So, I’ll cover the steps to set up CSM on Gigabyte and how to deal with some common issues in this article.

to set up CSM, you’ll need to access theBIOS/UEFISetup utility first. you may do this by pressingDel/F2at boot on most Gigabyte systems.
IfFast Boot is enabled, the BIOS key may not work. In that case, you may restart your PC 3 times in a row to boot to the recovery environment.
Here, you may selectTroubleshoot>Advanced Options>UEFI Firmware Settings.
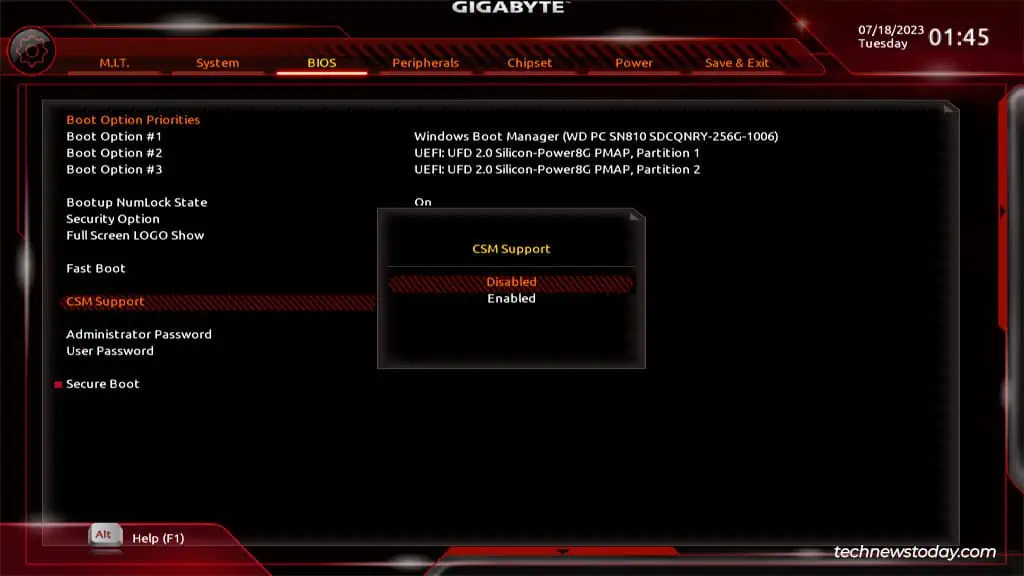
Configure CSM On Gigabyte
Enabling CSM switches your boot process to the legacy BIOS-style where the boot loader is read from the boot sector. The main advantage of this is that you may boot from olderMBR-formatted disks.
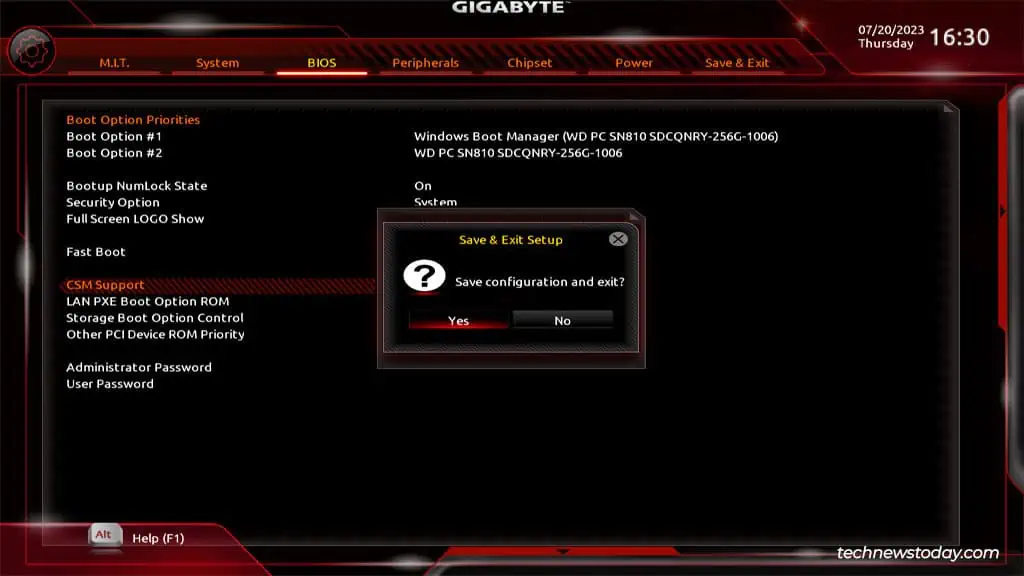
After enabling CSM, don’t forget to verify that you canboot from the intended device.
Disabling CSM In BIOS
While this does depend on the board, CSM generally makes UEFI features likeSecure Bootunconfigurable. So, if you want to use such features, you’ll need to disable CSM.

After disabling CSM, you should verify that the desired features like Secure Boot orTPMare working properly now.
How to Fix If CSM Setting Doesn’t Save
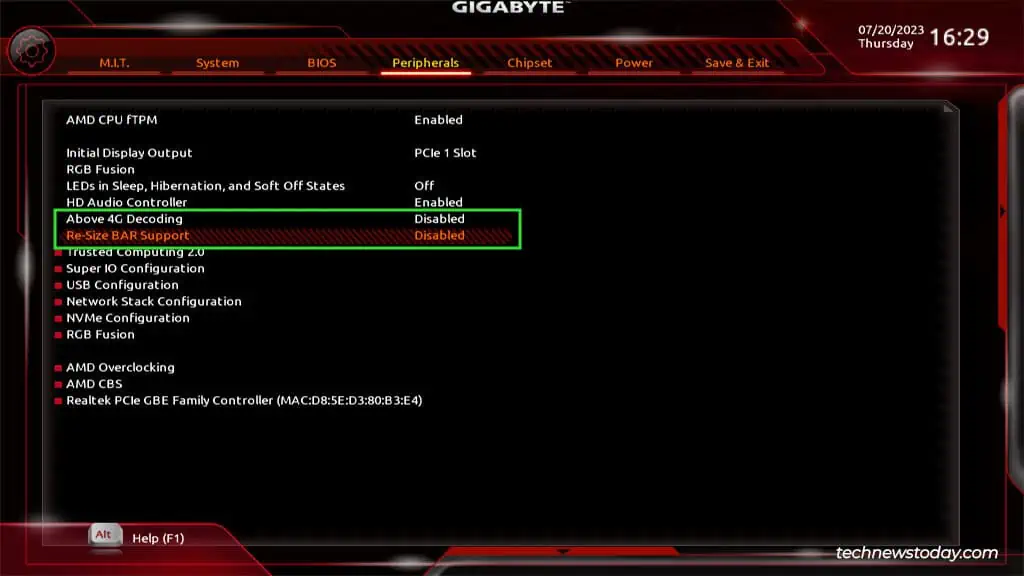
On some boards, users attempt to enable CSM but it keeps resetting to Disabled. This happens because conflicting UEFI features likeSecure Boot,Re-Size BAR Support, orAbove 4G Decodingare enabled. You should manuallydisablethese settings, restart, and then try enabling CSM.
The opposite of this scenario is a much more common problem. I’ve found that a lot of users wanted to enable Secure Boot for Valorant, or simply for its security benefits.