Most MSI boards support motherboard RAID through theIRST(Intel) orRAIDXpert2(AMD) technologies. You might’ve also seen such RAID arrays go by names like onboard RAID, BIOS RAID, or FakeRAID.
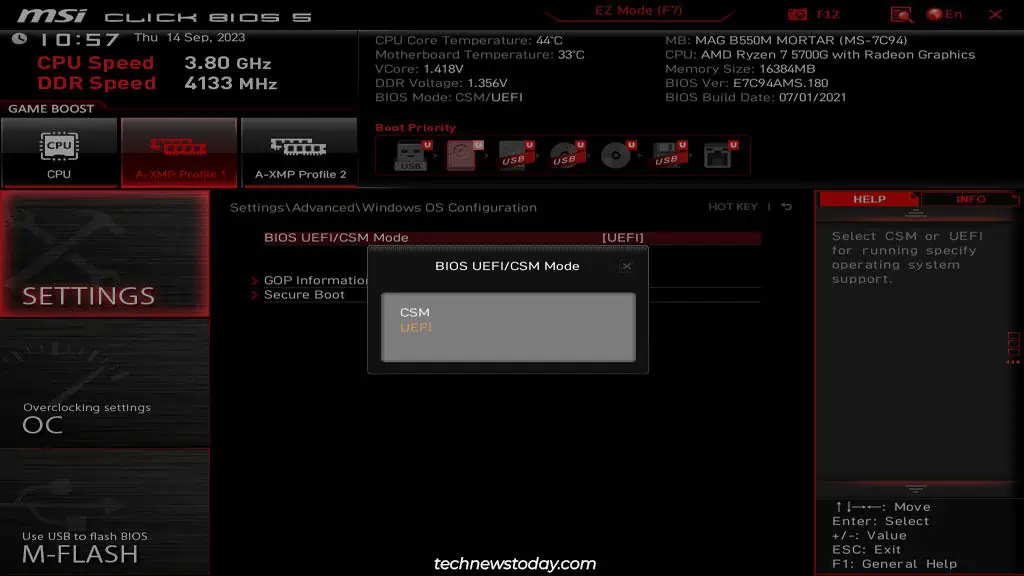
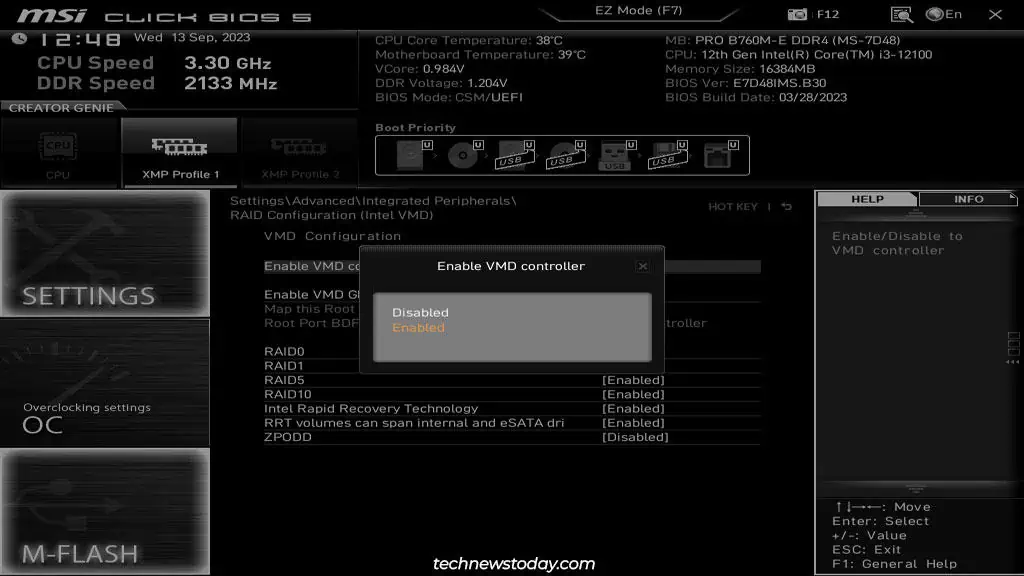
To create anonboard RAID array, you must firstset the storage controller to RAID modein the MSI BIOS. Then, you canselect the disks and RAID levelto use and set up the array to your liking. Finally, after loading the RAID drivers, the volume becomes recognizable by Windows.
It’s a simple process overall, but the steps may vary slightly depending on your exact setup. So, I’ll guide you through each step of setting up SATA and NVMe RAID arrays on MSI motherboards.
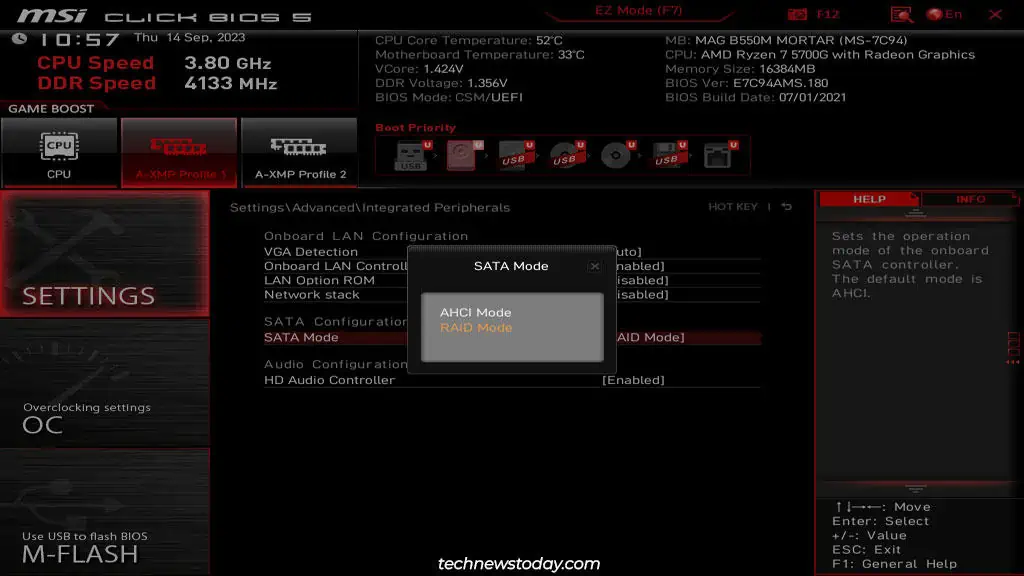
Setting RAID Mode in MSI BIOS
If you haven’t already done so, you shouldinstall the NVMe/SATA drivesat this point. ensure you’re using identical drives (size and speed) to prevent any bottlenecks. Also,backup any files elsewhereas these drives will be formatted when you create the array.
Note: If you have an expansion card with multiple M.2 drives, you should connect it to a PCIex8 or x16 slot. Then, split the PCIe lanes to x4x4x4x4 or a similar split according to the number of drives used. If you don’t do this, somedrives won’t be detected.
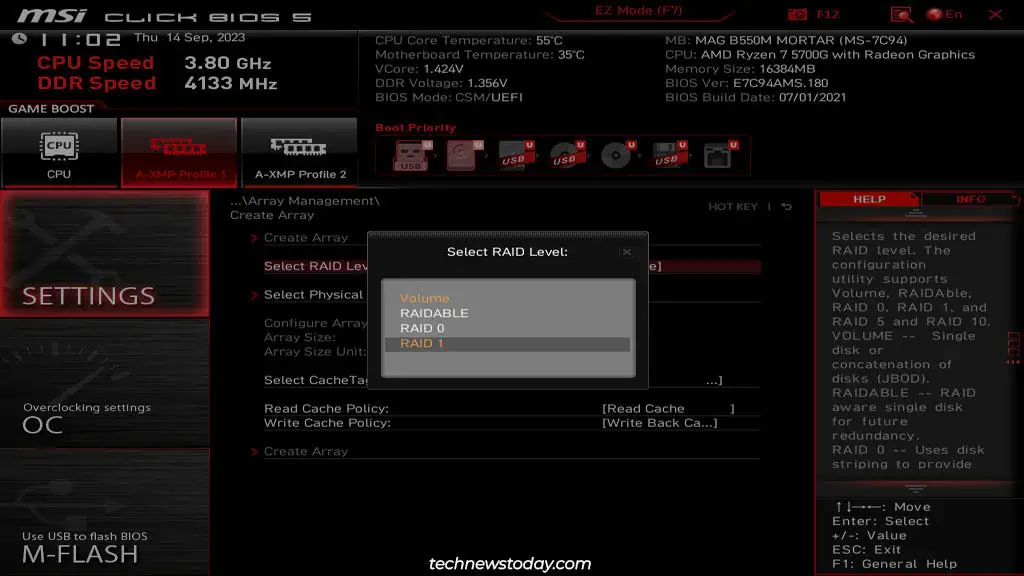
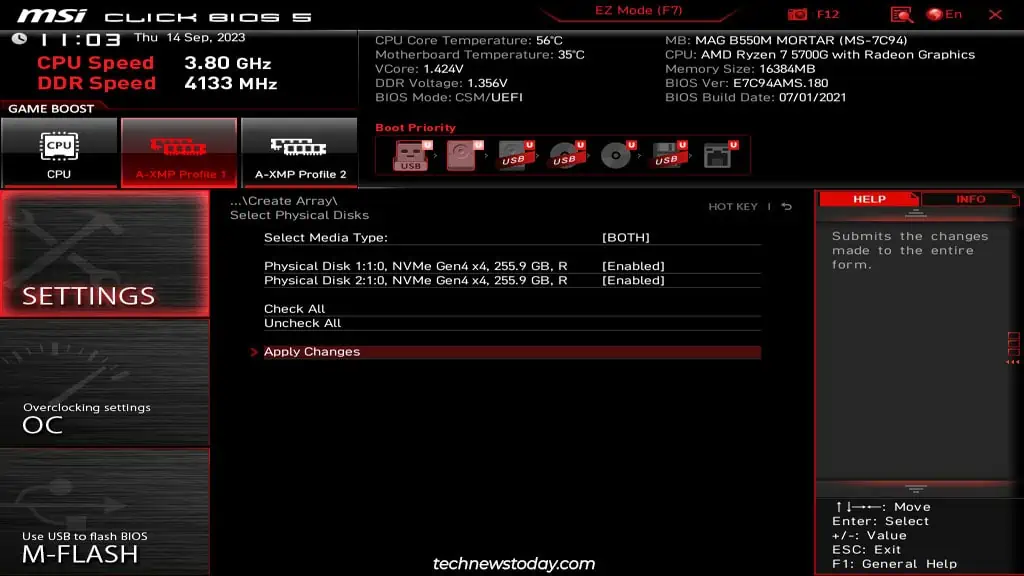
Creating the RAID Array
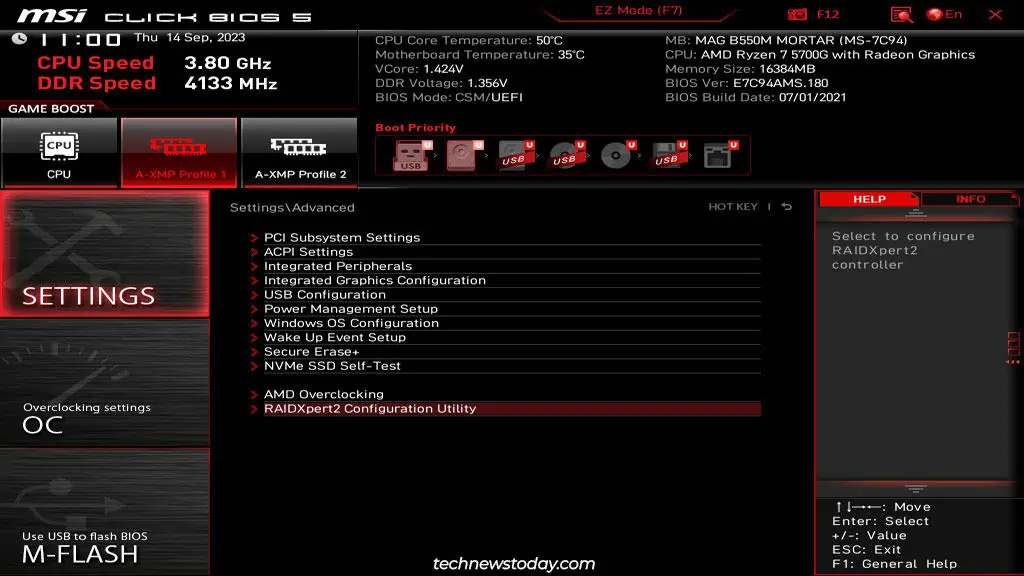
Now that yourMSI BIOS is configured properly, you may utilize the steps from theRAIDXpert2orIRSTsection to create the RAID array.
Using RAIDXpert2 (AMD)
Installing the RAID Drivers
Once you create the RAID array, the next step is to install the OS onto it and boot with it. The process goes something like this:
After Setting Up RAID
RAID was designed to provide storage and performance benefits and ensure your system doesn’t go down because of a failed disk. Although commonly misunderstood, it is not the same thing as a backup.
You could still lose your data due to various reasons ranging from multiple disk failures to malware or simple human error. So, it’s very important that you set up a separate backup of any critical data elsewhere.