If you are not a regular PC builder, it might be daunting to see the profusion of tangled wires inside the CPU casing. However, it is much simpler than it appears to assemble and connect the power cables to the motherboard. You just have tofind the correct ports and that’s all.
It is obvious that the hardware requires power to function. But the power is not directly supplied to them. Most of the essential hardware components are embedded into the motherboard with printed circuits between them. The motherboard acts as the bridge to supply power to several internal hardware in a computer.
Only the CD drive, HDD, and some other hardware receive power directly from the power supply unit. For others, you need to link the power connectors to the motherboard and attach the components to the respective port on the board.
With this comprehensive guide, we are going to learn how to connect the power supply to the motherboard.
How to Connect Power Supply to motherboard?
When you bring the power supply unit or PSU out of the box, you will see a number of wires with connectors at the end. Each of the connectors is meant to supply power for different hardware. It is quite confusing to find the right one for each of them.
However, in the messy jungle of wires inside the casing, the hardware manufacturers have given us a slight advantage. The power supply connectors can be linked in only one way to the ports. That is, if you connect the wires in the wrong way, it won’t go in and you will know to flip it.

So, let’s start to connect the power supply to the motherboard step-by-step by arranging a screwdriver set and the will to do the work.
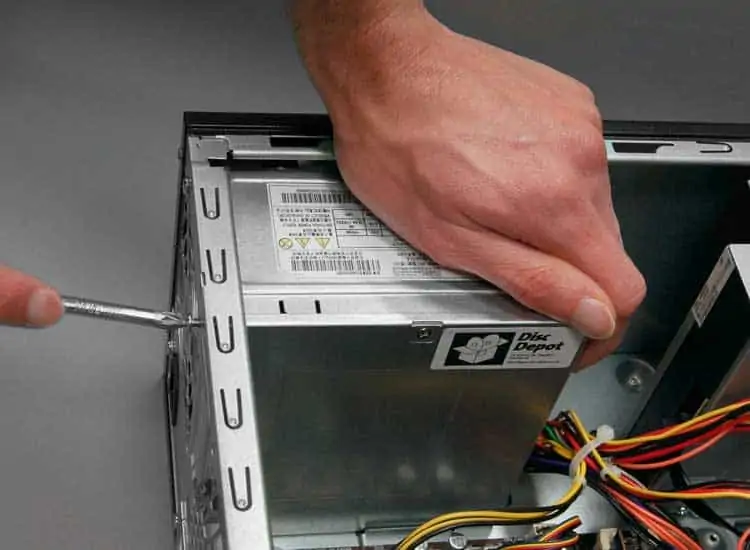
Assemble the Power Supply Unit to the Casing
The first thing to do is to place the PSU in theCPU casing.Most of the casings have a box-shaped empty space at the top to keep the PSU. If you have modified your system and have bought a custom casing, then you will have to look at its manual to find the space.
you may follow the instructions given below to assemble the PSU to the casing.
Now that you have assembled the PSU successfully, let’s move on to connect the cables.
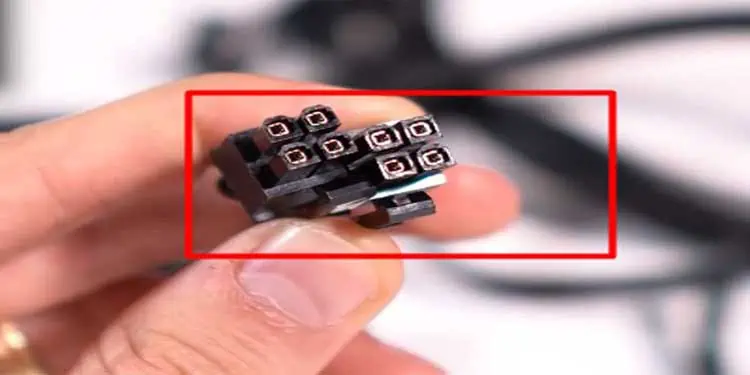
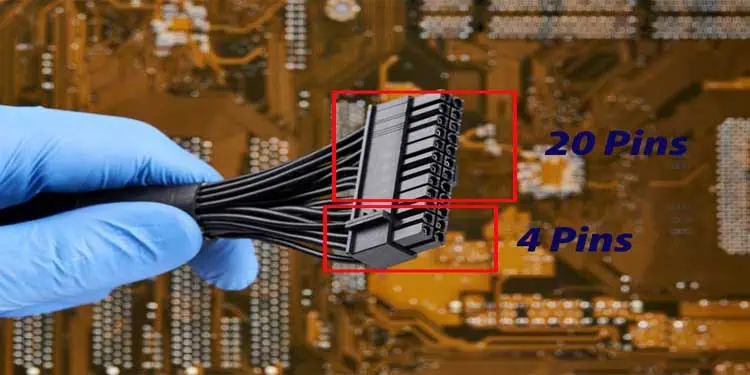
Connection of 20 (+4) pin motherboard Power Connector
This cable is one of the biggest connectors and provides the juice to run your entire motherboard and its components.
The reason we are writing the pin as 20 (+4) is that the connector has a bigger portion with 20 pins and a separate one with 4 pins. The reason behind this is to facilitate the older motherboards that had only 20 holes to insert the pins.