If a user opens a bandwidth-hungry application, all the other devices are going to experience a slow internet connection. While it’s possible to kick devices off your network, this isn’t always the best idea.
Instead, you canset a limitationfor every connected device to prevent it from hogging up the bandwidth. With the help of the TP-Link router’s configuration interface, you may share the bandwidth equally or even set up the limits individually.
All you have to do is set aminimum and maximum bandwidth limitfor both Ingress (download) and Egress (upload). But in some routers, you might not get the dedicated Bandwidth Control option and should instead opt for QoS (Quality of Service). To understand this better, let’s dive deep into the steps below.
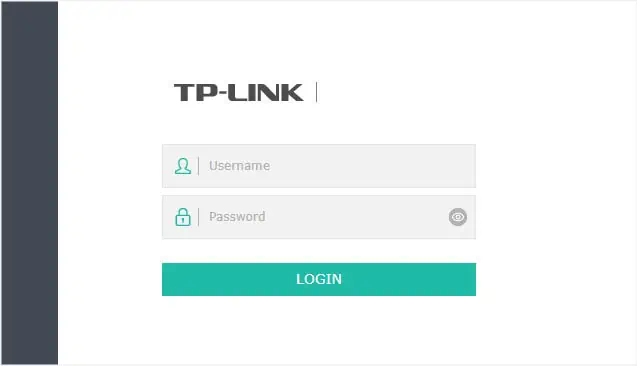
Step 1: Access Router’s Configuration Page
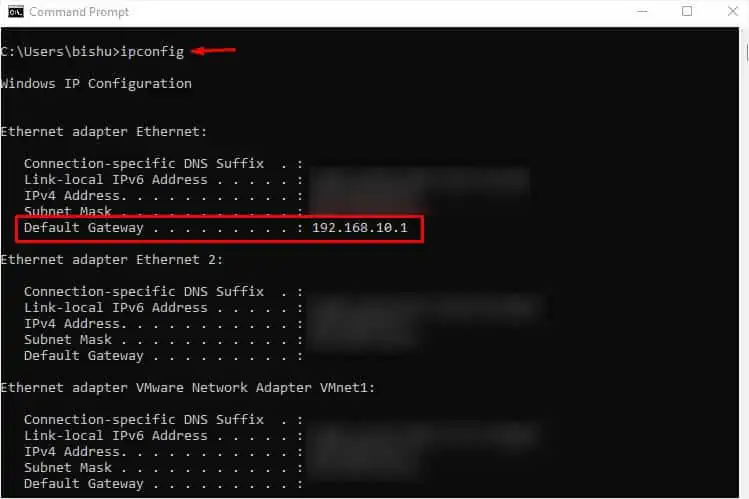
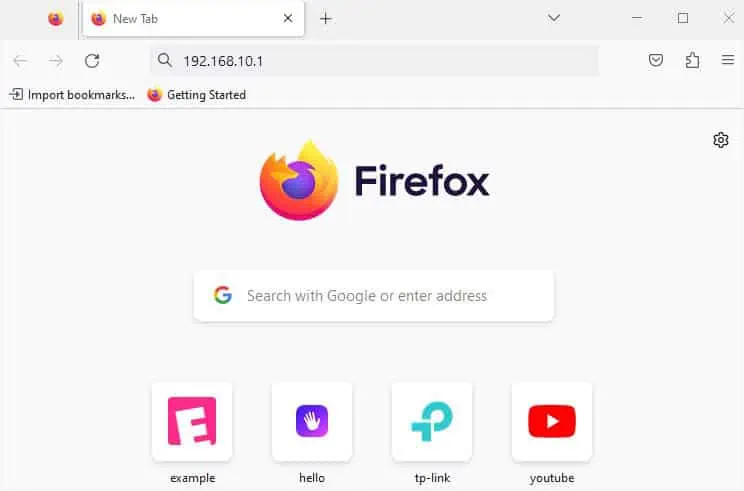
For beginners who have no idea how to access a router page, here are the following steps you may employ on Windows. If you want a comprehensive guide for other operating systems,here’s an articlethat should help you with that.
Step 2: MAC Address Reservation
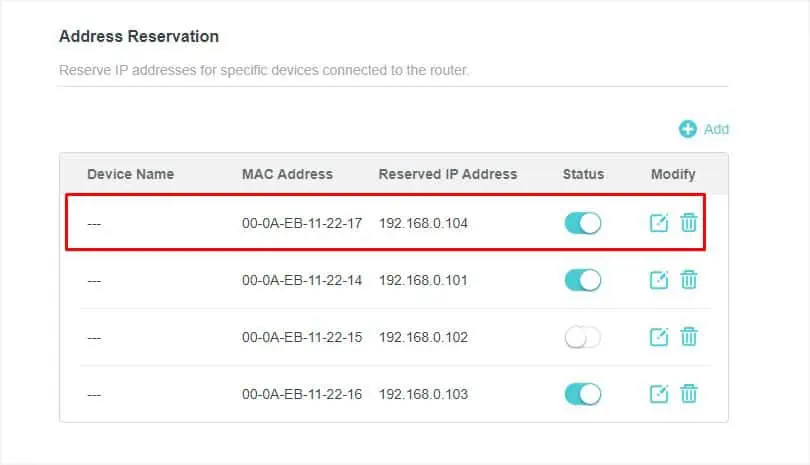
MAC Address reservation is a special feature available on most routers that lets you use static IP addresses for your specified devices. If you’re seeking to keep the settings permanent, it’s essential to reserve theMAC addressfor every deviceyou’re trying to set bandwidth limits.
Note:You may skip this step if you’re only trying to control bandwidth usage for a temporary device.
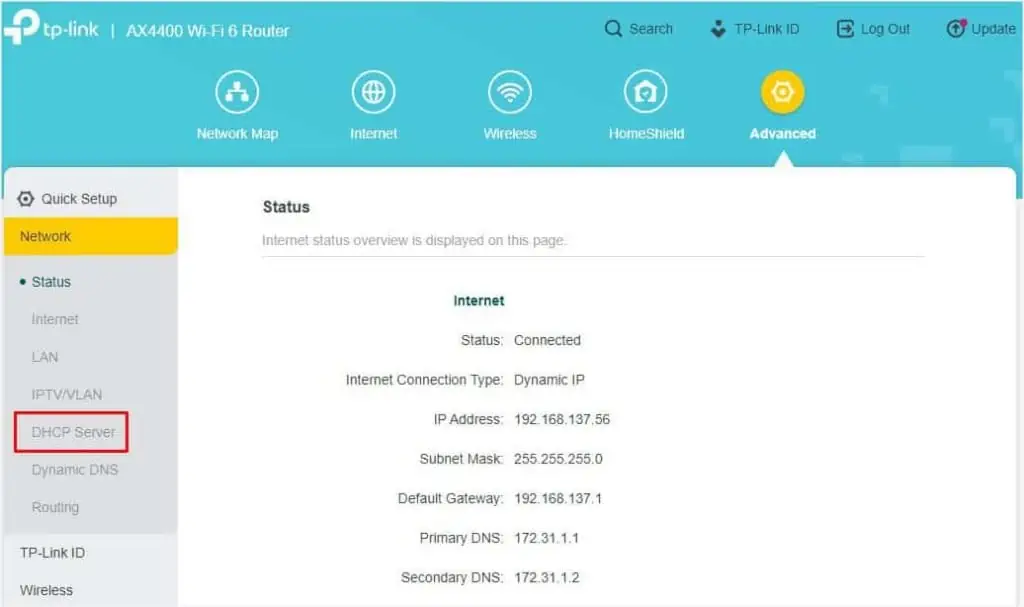
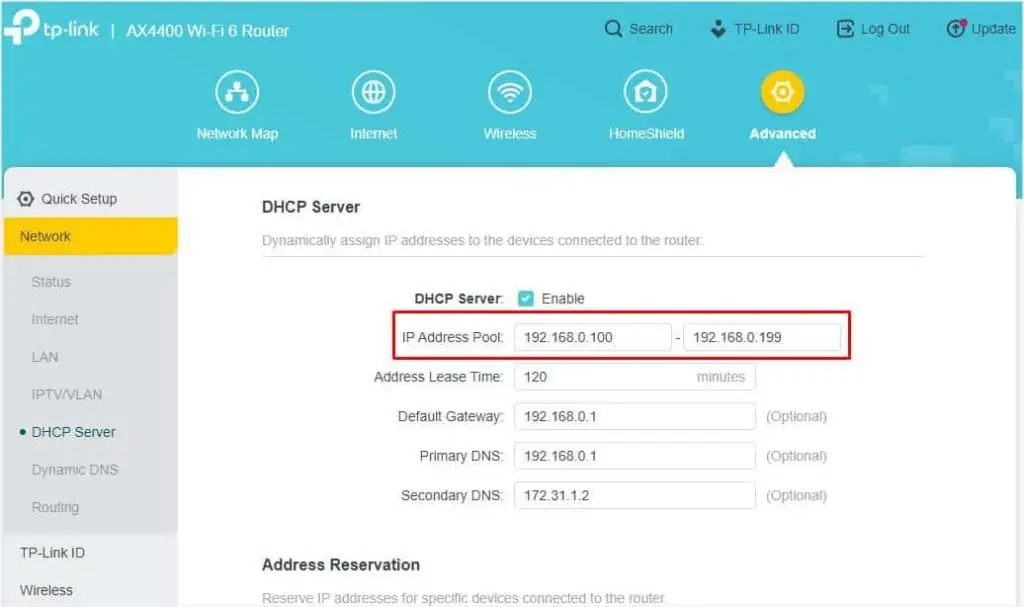
By default, a router utilizes theDHCP serverto assign dynamic IP addresses for each connected device. The provided address can change over time and when this happens, the applied settings won’t be applied.
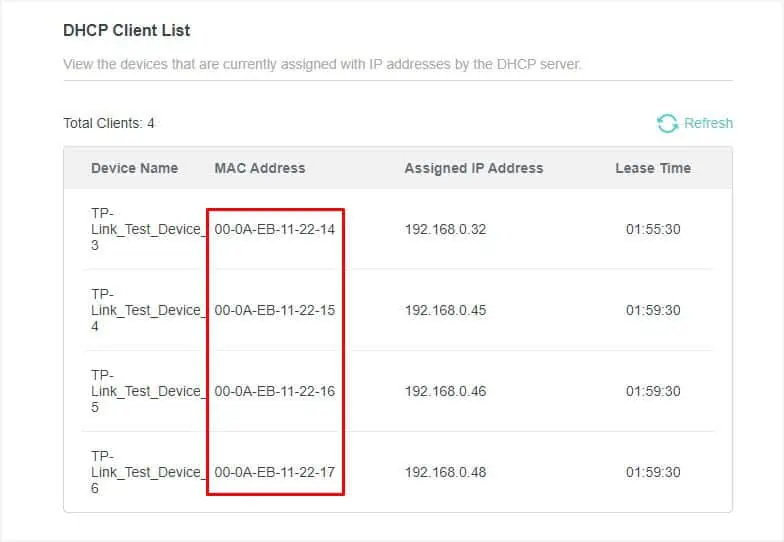
However, if you reserve specific/static IPs for individual devices, the router will recognize its MAC address. So, you do not require reconfiguring the settingseven if you disconnectand reconnect it.
Follow the general steps below on how to reserve a MAC address on a TP-Link router. I have used theAX4400model for the demonstration. The steps may vary slightly on your device.
Step 3: Configuring Bandwidth Limit
After assigning a static IP for each device, you may now get to the Bandwidth Control section to set up the related settings. However, not all TP-Link models support it. In such cases, you can opt for the QoS feature.
While the two are slightly different, the Bandwidth Control setting isavailable underthe QoS section in some TP-Link routers. Let’s understand how they work and the necessary steps to set up them in the different sections below.
Note:Some lower-end TP-Link models might not include either of the features.