Sagging is common with heavy graphics cards, especially those covering three or four slots. It’s not justaesthetically unpleasing, it can even lead toVRAM failureordamage the motherboard’sPCIe slotin the long run.
I understand that you’ve done everything right on the installation part. The thing is – every GPU can sag and itbecomes amajor concern only if it’s too noticeable. Luckily, this can be mitigated with very little trouble.
You’ll finddedicated bracketsandsupport framesto prevent GPU sag. But the cheaper option would beadopting a DIY solution.
So, why take the risk when you may invest a few bucks or just a few minutes to prevent this problem?
Try These Basic Things First
In severe situations, the basic measures also don’t help and this calls for a proper anti-sag solution. But before picking a product online, going for a DIY solution is always a better idea.
Insert Multiple PCIe Slot Brackets
Modern graphics cards are designed with a backplate that somewhat prevents the sagging issue.
Some even have ametal bar that’s directly mounted to the heatsink, providing sturdy support to handle the heavy weight:
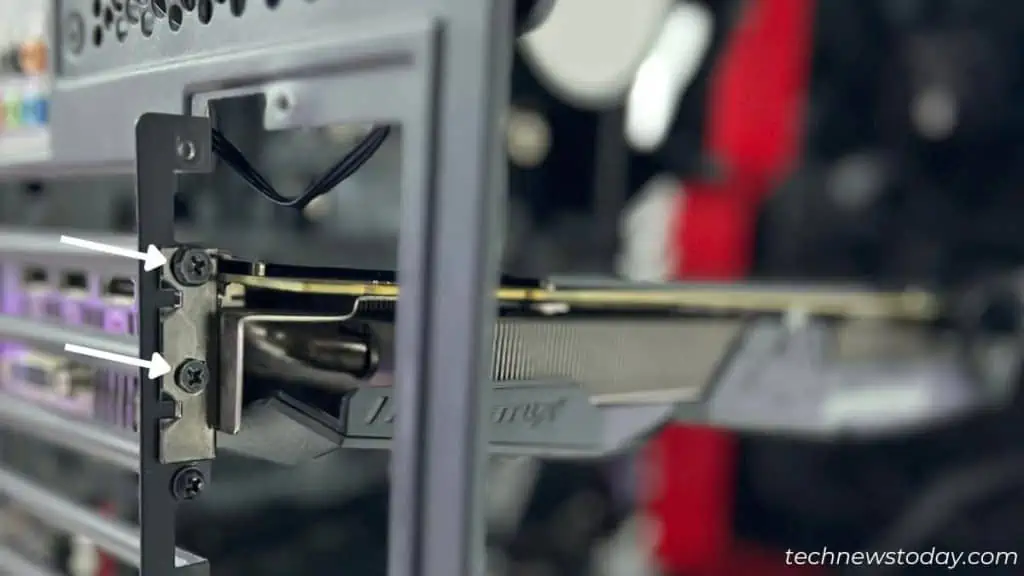
However, the older and low-end GPUs aren’t entirely secured. In this scenario, theremoved and unused PCIe slot brackets(adjacent to the ports) can be reinstalled just underneath the graphics card.
All you have to do isbreak the tabs,mount two/three brackets, andscrew them in. The sag will significantly reduce.

you may even get help fromJaytwocents’ video on how to do itthe right way.
The above step won’t work for PC cases thatdon’t support screwing the bracketsor if thecard has a metal bar underneath.
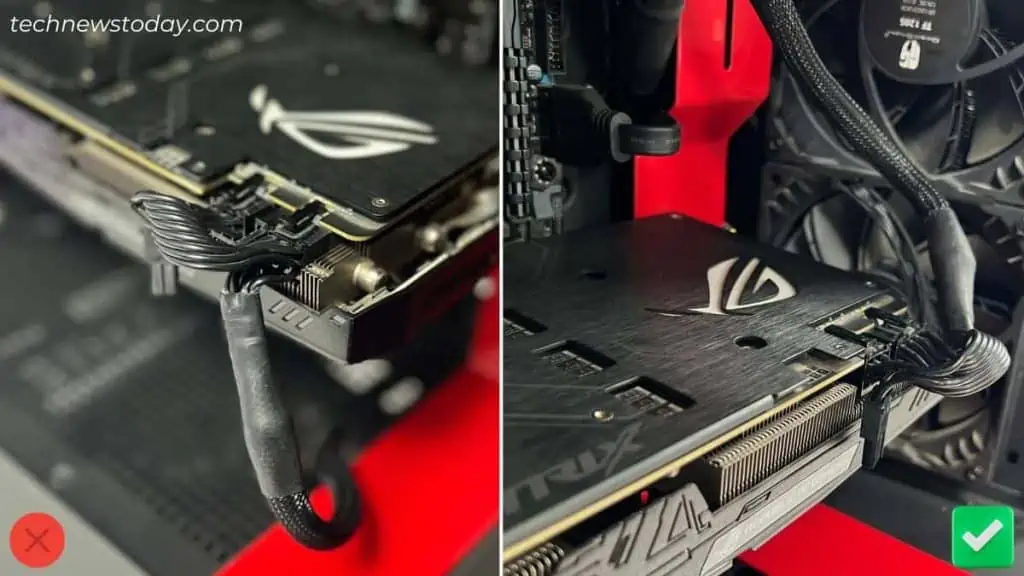
Instead, use a fishing line or a string/wire of appropriate length that’sstrong enough to handle the graphics card’s weight.

The idea is to tie one end to the sagging section (a ventwould do) and another somewhere on top of the case.

