We prefer the Disney Plus app when it comes to watching Disney, Marvel, or Star War movies. But, you may not always have the best experience as promised. Sometimes, while watching movies, the video stops loading. Or, in the worst case, the app keeps crashing while opening it.
Many users have reported that their Disney Plus freezes or displays errors on Roku TV. It can happen due to corrupted cache data. Similarly, using an outdated version of the app can also lead the app to crash.
So, let us guide you with fixes on how to fix Disney Plus crashing on the web, mobile, and Roku TV.
Why Does Disney Plus Keep Crashing?
Some of the common cause your Disney Plus app is crashing are:
How to Fix Disney Plus Crashing?
After identifying the causes for Disney Plus crashing, we have mentioned the possible fixes to troubleshoot the error. Sometimes simply relaunching the app might solve the error.
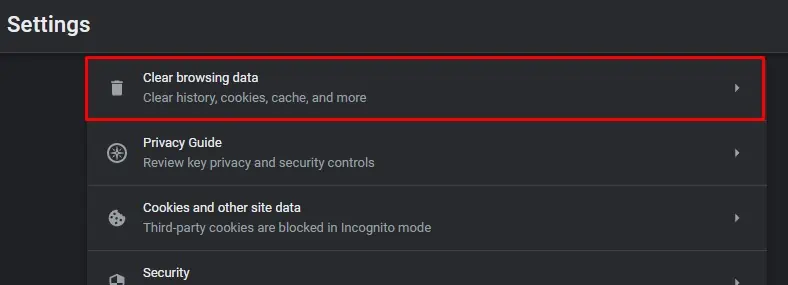
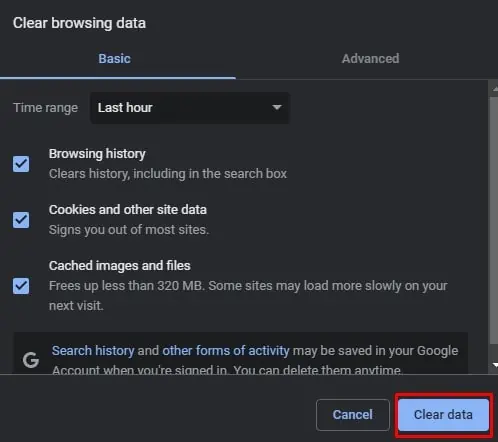
However, if the issue still persists, you may need to clear the corrupt cache data. Below are the steps for these fixes for iOS, Android, and web browsers.
Relaunch the Disney Plus
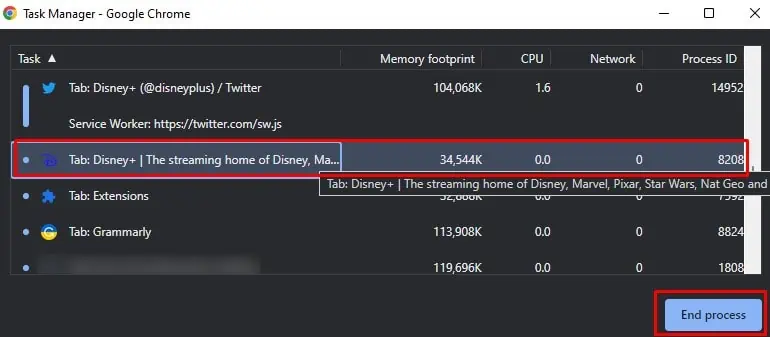
Many users have claimed that relaunching Disney Plus has solved the issue. If you’ve been using the app for a long time, the app needs to be refreshed. Restarting the app will clear the excessive RAM usage. Basically, it will solve any unknown glitches, freezing, and not loading errors.
You need to exit the app or website completely and then relaunch it to work. Also, close all the running background apps on your device for better performance. Here are the steps for it.
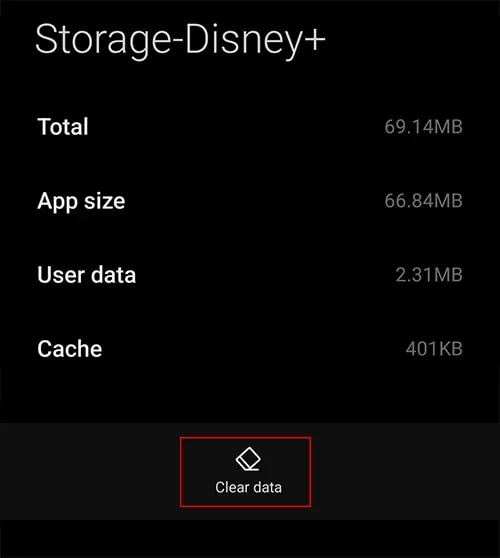
Clear Disney Plus Cache
There might be corrupt Disney Plus cache data stored in your device, causing the system to freeze and not load. So, another fix for the problem is to clear Disney plus cache data. Clearing cache will boost the app performance and increase the loading speed while streaming videos.
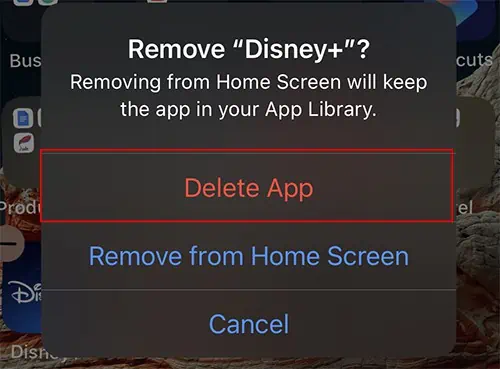
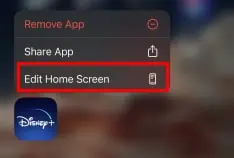
By default, there is no clear data feature oniOS settings. However, you candeletethe app to wipe all data and install it again. Besides, android users canclear cache datawithout uninstalling the app. Check out the steps for it below.
Update the Disney Plus App