Destiny 2: The Witch Queen’s campaign missions stand out from the other expansions. Not only in the level of storytelling but also in the way missions are structured. Guardians can no longer shoot their way through every encounter until they win. With The Witch Queen, there are puzzles, platforming, and complex boss fights. There is no better example of this than when players are making their way to the Temple of the Cunning.
Note: There are The Witch Queen story spoilers below!
Target Puzzles
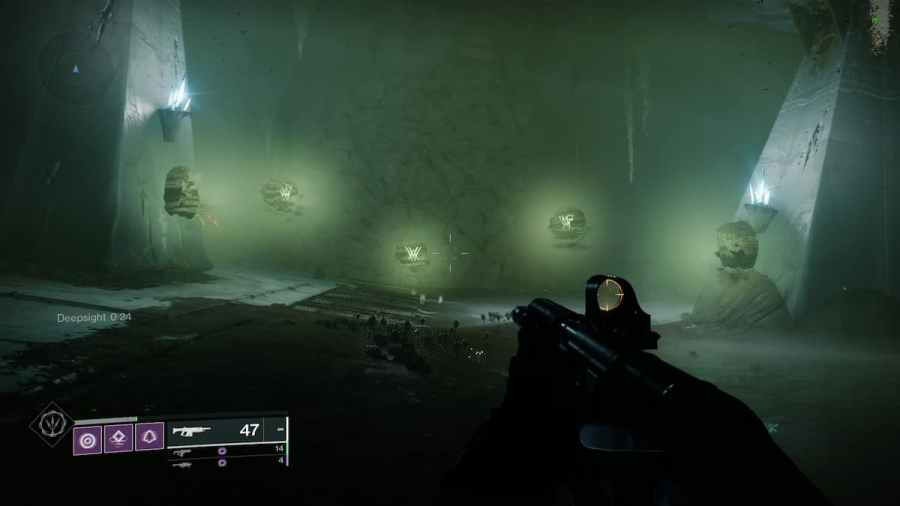
When playing through The Cunning mission on Savathûn’s Throne World, players will encounter multipleTarget Puzzles. These puzzles areactivated by a Deepsight Orb. Players will then be required to shootfive glowing targetsin order to advance. Most of these are simple, as all of the targets will be right in front of you as you activate the Deepsight Orb, however, there are a few that will require you to look around a bit more.
The first target puzzle players will stumble upon will be inan empty room with a Deepsight Orb in itsmiddle. Activate Deepsight in order to reveal five target runes. All five of the targets will need to be destroyed in order to progress. This first puzzle serves as an explanation of the target mechanic that will be used throughout the mission.
Related:How to complete the Gift of Appreciation quest in Destiny 2
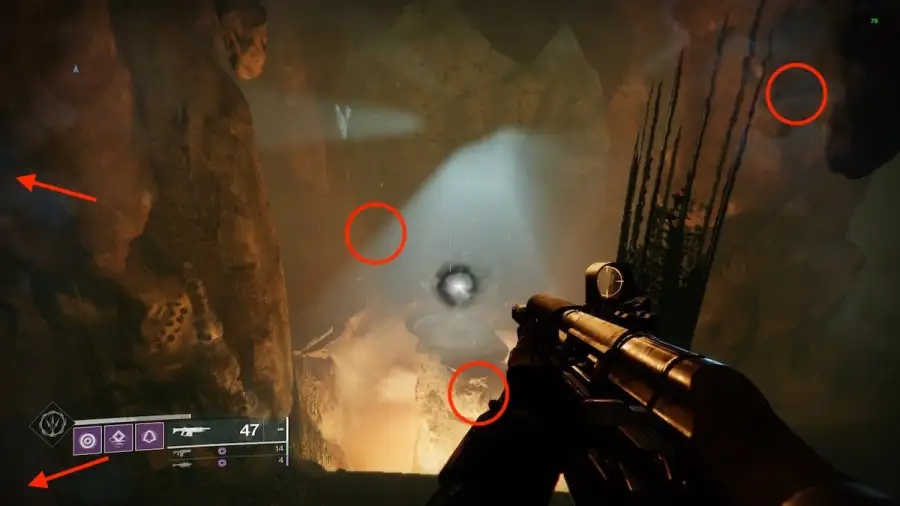
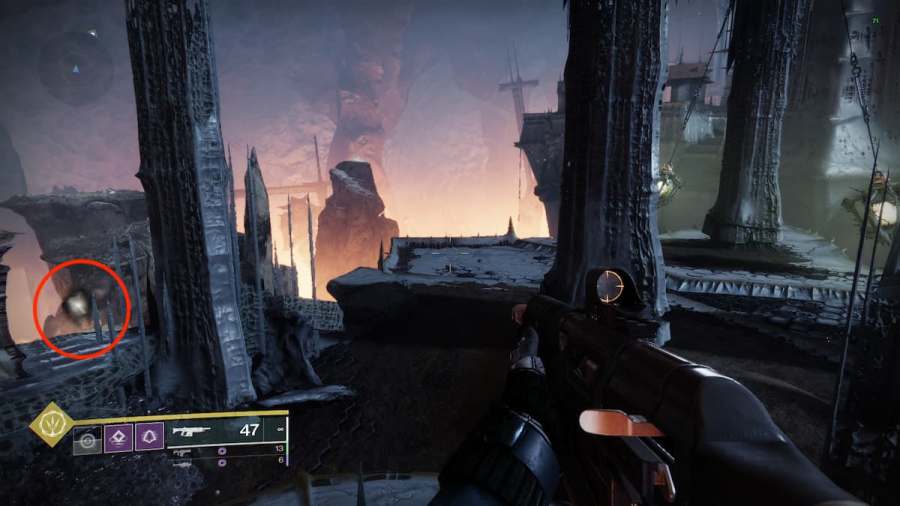
Players will eventually find themselves ina room that has a small island in the middleof it. The Deepsight Orb in this room will be located directly on the center island. This time thetargets will be scattered all over the roomprompting you to search for them. The image below gives the approximate locations of where the targets will spawn.
The Temple Bridge
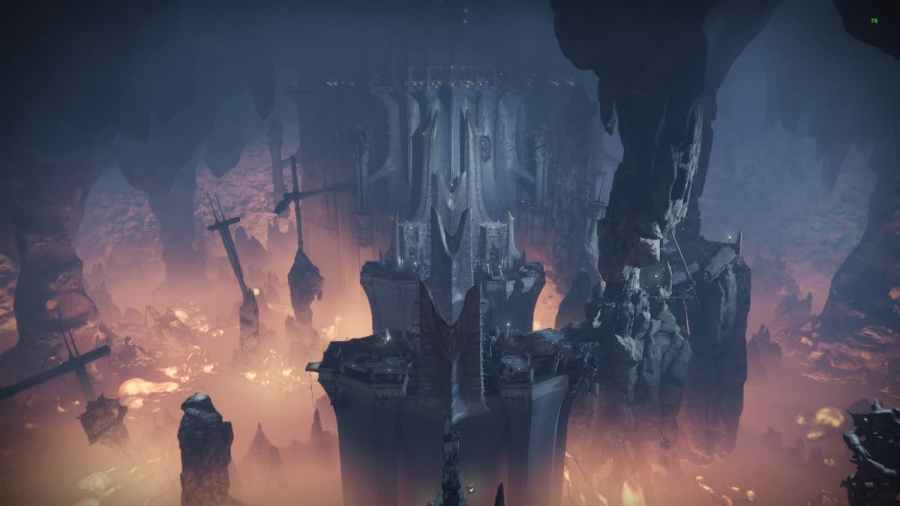
You will continue to progress through the mission until you arrive ata large cavern housing a Temple. You will jump down onto a bridge that leads towards the Temple and continue to fight your way towards it. Eventually, you will reach a break in the bridge marked by two swinging pendulums.To the left of these pendulums is the Deepsight Orbyou need to activate.
Jumping on the newly materialized platform will place you in front of all five required targets.From this point through the rest of the mission, all targets will appear in front of you when activating the Deepsight Orb. This will make the rest of the target puzzles in this level a breeze.
Guardians will finally reach the Temple where they will see a statue of Sathona (Savathûn) holding her worm familiar.Beat the yellow bar Warrantand you will be confronted with one more Deepsight Orb. After activating it,head to the left of the statue to find five more targets. This will reveal the path up to the statue where you can grab the worm familiar, triggering the final boss fight.
Related:Who is The Witness in Destiny 2: The Witch Queen?
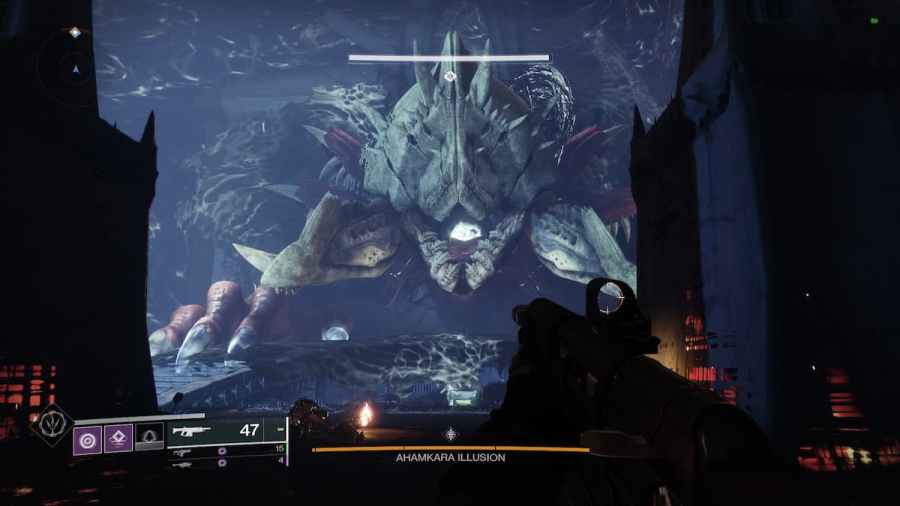
Ahamkara Illusion
Once the illusion spawns,it will be invulnerable to all damage. It’s only after the illusion fires a massive attack that it becomes momentarily vulnerable. Send a rocket or twowhile its mouth is glowing red to inflict damageon this foe. After taking down each tick of the illusions health, a bunch of ads will spawn in to try and take you out.
Once all of the ads have been cleared and the illusion has been slain, players will receivethe Suffocating Haze debuff, giving them roughly two and a half minutes to escape the temple. Luckily, there will be Pikes that you’re able to hop on to escape with speed. We recommend not stopping to fight the enemies in your path, as you will not have time to eliminate them and still escape with your life.
So there you have it, that is how to complete the Temple of the Cunning in Destiny 2: The Witch Queen. This is a great example of a mission similar to fan-favorites such as Presage or Harbinger, and it is a welcome departure from the classic Destiny formula.
For moreDestinyguides, check outHow to get Sweet Business in Destiny 2 – Queen Beckons Exotic Questright here on Pro Game Guides.