Navigating the Operating System on laptop heavily depends on the touchpad. Even the BIOS supports navigation through the touchpad. So, it becomes more than a mere inconvenience when your touchpad does not work, unless you connect an external mouse to the PC.
Touchpads on laptops doesn’t malfunction very often. But, physical damages like broken wire may stop the touchpad from functioning, wrong system touchpad settings and driver issues most likely cause issues with the touchpad.
Why is Dell Touchpad Not Working?
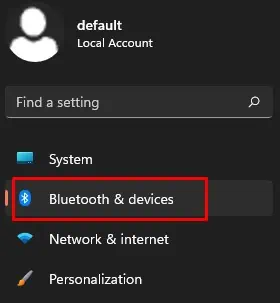
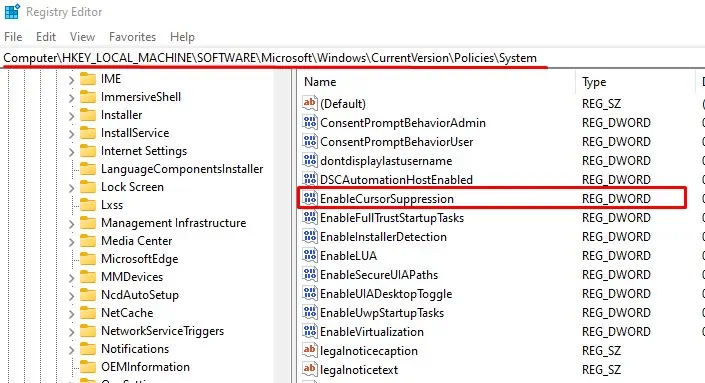
One common and simple reason the touchpad does not work is when the touchpad is disabled. you may find configurations in Windows Settings, BIOS, Registry, and many more where you need to enable the touchpad. Even if the touchpad is disabled on any of the fronts, it will not work.

How to Fix a Touchpad That is Not Working on Dell Laptop?
Below, we have explained some methods to fix the touchpad on a Dell laptop.
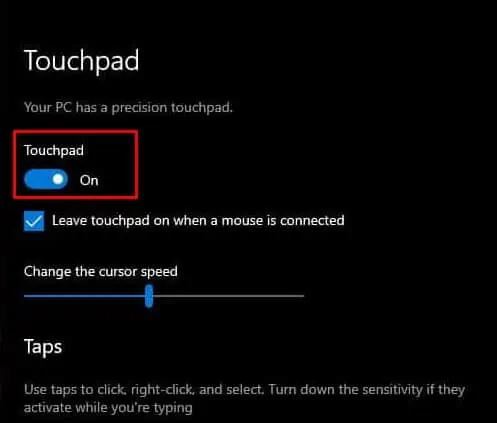
All the settings that control the touchpad usability are enabled by default. Windows updates andBIOS updatesmay cause these configurations to change. If even one touchpad configuration is disabled, the touchpad will not function.
Therefore, let us start by enabling the touchpad from the BIOS.

Enable Touchpad Using BIOS
BIOS, or the Basic Input Output System, has full access to all the hardware components connected to the system. Besides setting boot options or system preferences, you may enable or disable any piece of hardware components. And this includes the touchpad.
Below are the steps to enable the touchpad from the BIOS.
Enable Touchpad Using Hotkey
Most laptops, including Dell, may have a dedicated key to disable or enable the touchpad. The touchpad will not function when the LED on this key is on. The key is usually one of the function keys with the touchpad icon.

Press Fn + touchpad keyto enabling or disable the touchpad. Your laptop may or may not have this touchpad function key. If your laptop does not have a separate touchpad function key, please follow another solution mentioned below.
Enable touchpad from Device Manager