Failed updates, power surges, bad overclocking, and hardware incompatibilities can all lead to firmware corruption. Whatever the scenario, the built-inCrashFreeutility on ASUS systems can help users recover it.
Along with the latestASUS CrashFree BIOS 3,there are three other ways that have often turned out to be helpful. These includeclearingCMOS,switching tobackup BIOS(if your mobo supports two NVRAM chips), or updating itusing theUSB Flashback button.
Recently, our TechNewsToday team got the “BIOS recovery mode has been detected!” error on our three ASUS boards–PRIME B450 PLUS,ROG STRIX B550-I GAMING, andROG ZENITH II EXTREME. As stated on the screen, we prepared a removable storage media, rebooted the system which triggered the CrashFree utility, updated the BIOS, and bam! The problem was solved.

Let’s begin with the most basic troubleshooting you may do. While I understand that you’re unable to get to the BIOS screen but loading the optimized defaults from the interface isn’t the only way.
Resetting BIOS settings can come in handy in situations where yourBIOS got corrupteddue to improper overclocking or even when the POST fails. You’re basically going to revert the firmware to its default settings, and here are the different ways to do so:
In case you’re finding it difficult with the above steps, here’s my detailed guide onresetting ASUS BIOS.

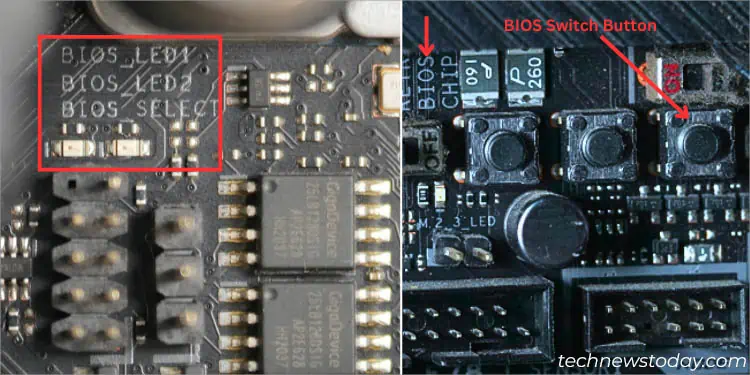
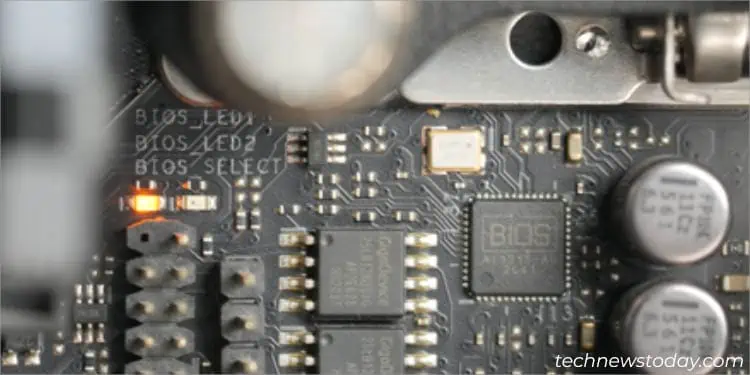
After comprehensive testing at the TNT office, we can confirm that only a handful of high-endASUS ROG boardscome withdual BIOS chips–MainandRecovery.
When anything goes wrong with the primary BIOS, the secondary gets activated and flashes the factory firmware on the Main BIOS chip. While this process usually happens automatically (you need to power cycle your PC), it’s also possible to trigger it manually as well:
Via ASUS CrashFree BIOS Utility
If you were planning to dump your motherboard after a failed BIOS update, what if I tell you there’s actually a way to recover it? The CrashFree BIOS utility from ASUS is anauto-recovery featureto help restore the BIOS using a backup image.
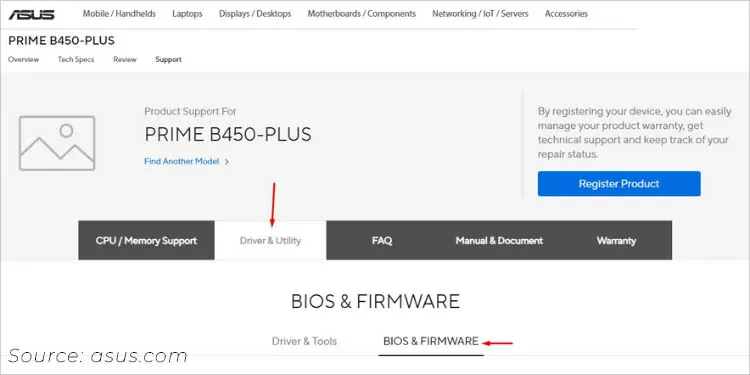
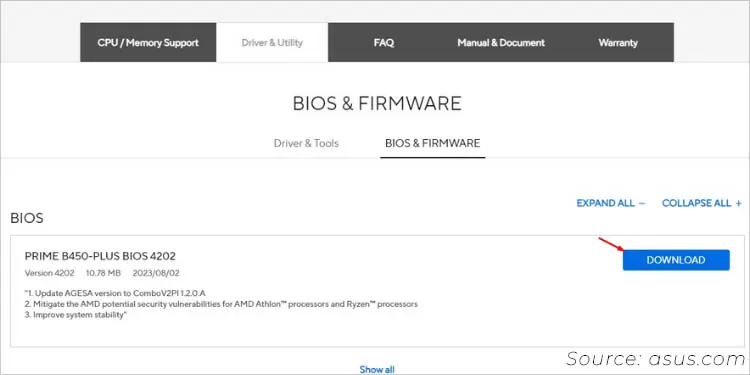
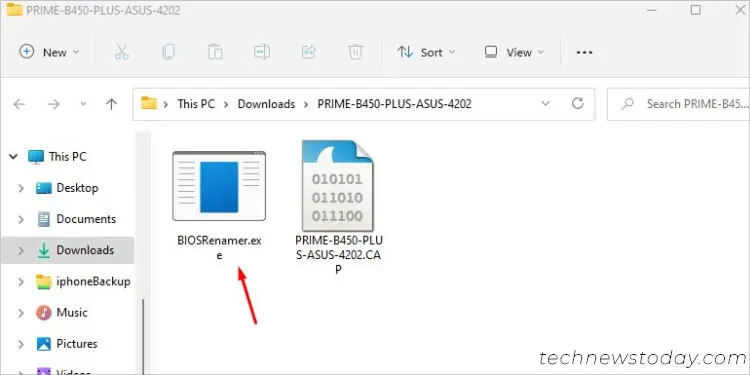
However, that doesn’t mean the recovery utility kicks in as soon as you reboot your computer. There’s a step-by-step process and you require either a flash drive or the motherboard DVD to trigger the ASUS EZ Flash.
Since you’re going toupdate your BIOS, ensure youwon’t experience any power failureduring the process. I recommend connecting your PC to a UPS or inverter (that’s exactly what we do here at the TNT office).
Check for CrashFree Support
Even though most ASUS models support this feature, it’s always a good idea to be super sure before proceeding forward. If you have auser manual, you may confirm it from there.
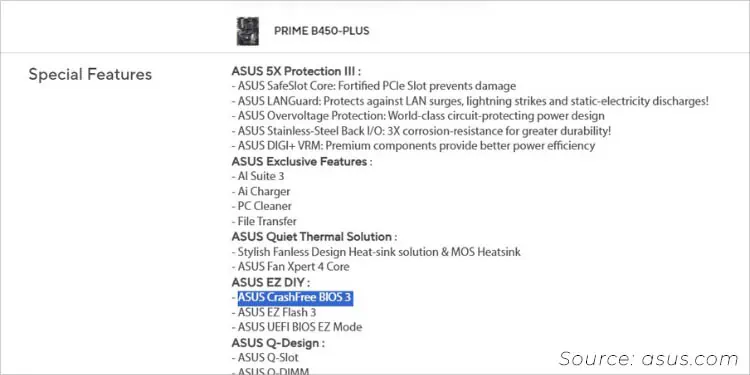
Another easy technique is to look up theTech Specificationssection of your model from theofficial ASUS website. Search “ASUS CrashFree BIOS 3”or an older version and you should find it underSpecial Features, as demonstrated on ourPRIME B450 PLUSmotherboard above.