Taking screenshots is an essential skill that every computer user should possess. If you recently switched to a Dell PC or laptop, you do not need to worry, as capturing a screen is not at all different from any other manufacturer.
Well, screenshots can help you save any relevant content for future reference and also when theSave Image feature isn’t workingor is unavailable. Interestingly, there are several ways to capture your display, and in this article, you will learn how to do this on your Dell PC or tablet.
In this article, we will mainly cover the shortcut keys for taking screenshots using various methods. So, before moving ahead, it’s important to know about the following key combinations and their functions:
How Do You Screenshot on Dell?
Taking a screenshot on Acer, Dell, or any other manufacturer is incredibly simple. you may do it using dedicated keys, built-in Windows tools, or third-party applications.
Regarding the same, you may follow this section to learn the detailed process of taking a screenshot on your Dell PC or laptop.
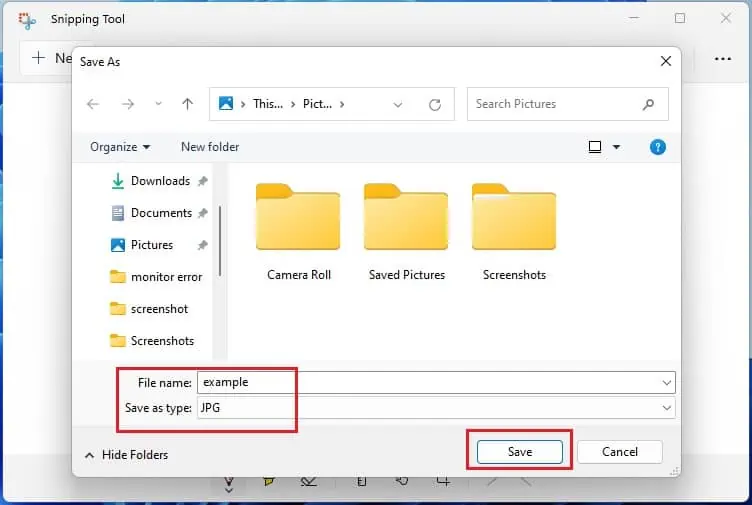
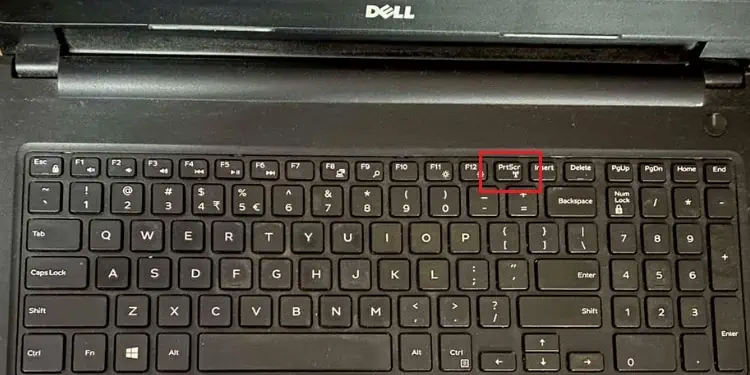
First and foremost, the best way to capture a screen is by using the PrtSc or the PrintScreen key. However, this will only copy the screenshot on your clipboard; hence, you must paste it into any graphics editor to save it. Here’s a quick demonstration of how you may do just that:
Unfortunately, the PrintScreen key on some Dell keyboards might be absent. In such a case, you need to utilize the combination ofFunction (Fn) and a specified key (usually End or F10)to capture your screen.
Moving on, if you’ve split your screen for multi-tasking, you may wish to take a snap of just the active window. In such a case, you’ll need to use theAlt + PrintScreenhotkey. While doing so, ensure that you are in the window where you’re trying to take the screenshot. Now, repeat the above steps to save the image.
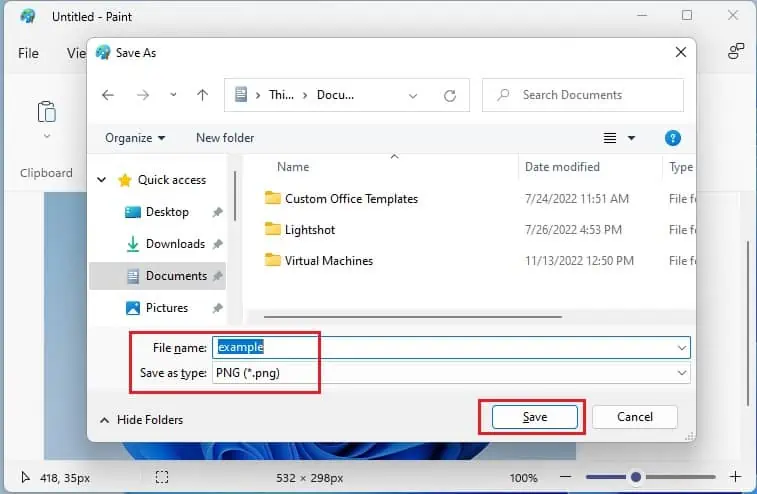
Well, if you’re not planning to make any edits to your snap and wish to save it directly, we recommend pressing theWindows + PrtSchotkey simultaneously. This will slightly darken your display for a second to confirm that the screenshot has been taken. By default, the image is saved as a PNG file in the following directory:C:\Users[YourPCName]\Pictures\ScreenshotsKindly change the ‘[Your PC Name]’ to your PC’s name to navigate to the above location.

The above steps are only applicable if you’ve installed Windows on your Dell PC. But you’ll need to use different shortcut keys if you’re running another operating system. For example, to take or crop a screenshot on macOS, you may utilize the combination ofWindows + Shift + 3 or other keys.
you may check theBefore You Beginsection above to learn more about the shortcuts for macOS.
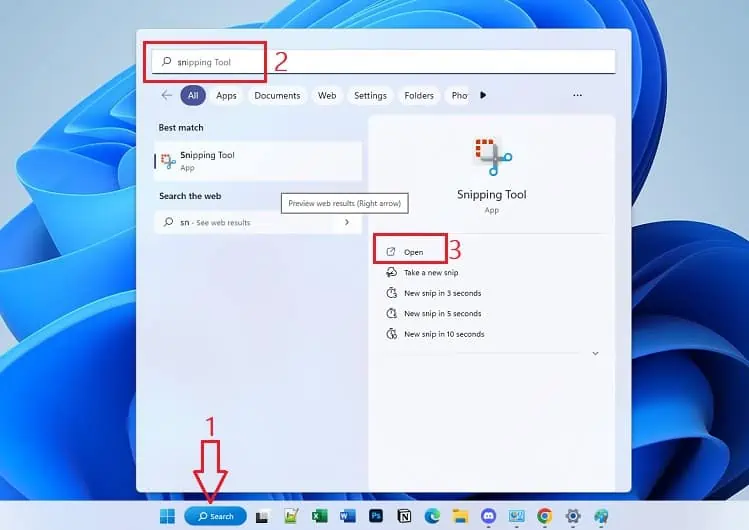
Another way to capture your Dell screen is using the Snipping Tool orSnip & Sketchutility (available on older Windows versions), which is a built-in Windows utility. you may either launch the application or use hotkeys to start a snip.
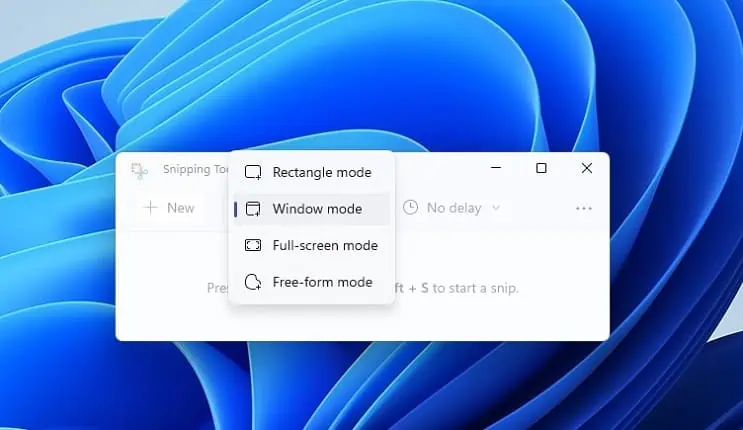
Now that you’re aware of the different snipping modes, kindly follow the below guide to take a screenshot on your Dell computer using the Snipping Tool:
Well, this was the manual way oftaking screenshots on Hp, Dell, and other models using the Snipping Tool. Alternatively, you may press theWindows + Shift + Shotkey to launch the snipping interface directly. Then, choose a mode from the menubar and proceed accordingly.