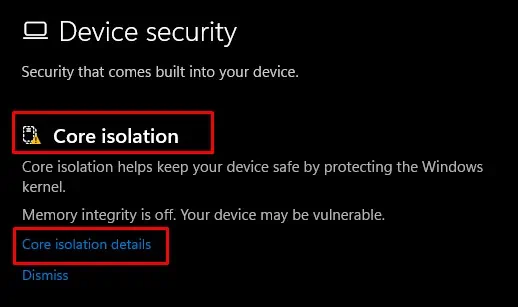
Memory Integrity is one of the components of Core Isolation. It uses virtualization-based security to prevent applications/third-party software from injecting malicious code into core system processes.
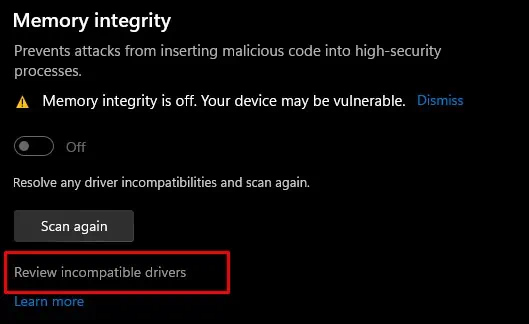
Windows enables Memory integrity by default. However, Windows turns off this feature if it detects any issues with the device drivers. It could be a corrupted, incompatible, or outdated driver. So, the best way to resolve the issue with memory integrity is to review these incompatible drivers and update or remove them.
Review Incompatible Drivers
One particular reason you cannot enable memory integrity is due to driver complications. It could be an outdated or corrupt driver that is restricting you from enabling memory integrity.
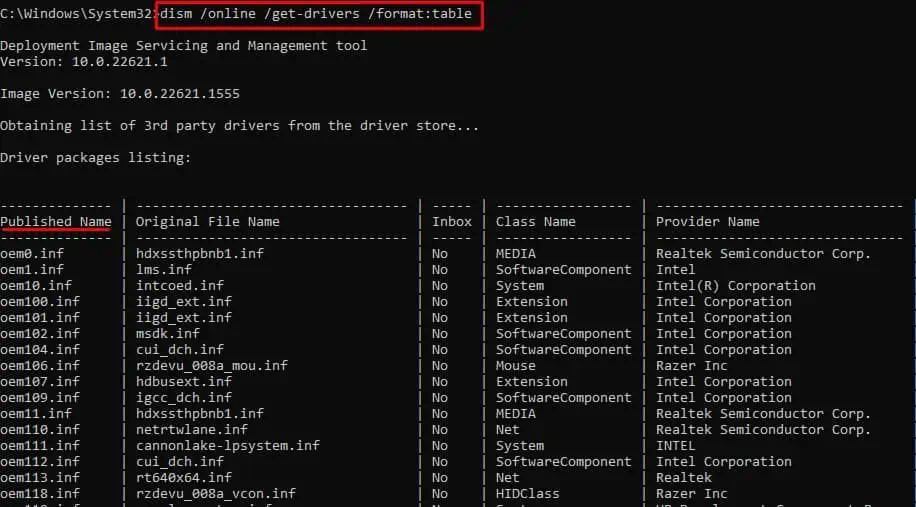
To enable Memory Integrity, you first need to review incompatible drivers.
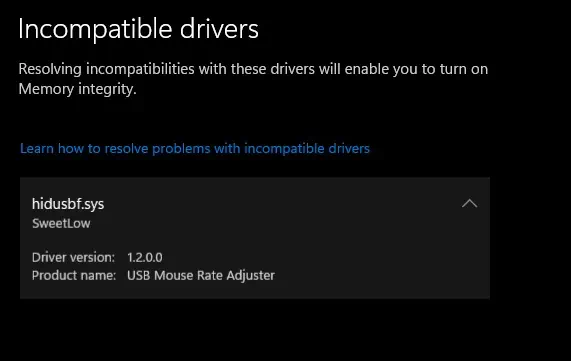
Once you have the Published/Product name, you need to either update the driver or remove them.
Windows does not recommend removing the driver, so we will first attempt to update the driver and see if it fixes the issue.
Update Incompatible Drivers
To enable memory integrity, we will try updating the outdated drivers mentioned above.
Delete Incompatible Drivers
If updating the incompatible driver does not work, you canremove the entire driver. Here’re the ways you may do it.
This step is only applicable if the incompatible driver list has a driver with a Published name. If you do not have a Published name value on the incompatible driver, you may try the next method.
To determine the faulty driver in Autoruns, you need to find the application that is using the driver with said Published name. you may do this using the DISM command.
Uninstall Application with Incompatible Driver
If the application with the incompatible driver is the one you don’t use too often, you may go on anduninstall the applicationas well. This will automatically remove the problematic driver from the system.